Glacier travel on skis requires specific gear and techniques for safe passage. Photo: Ian Nicholson.
As winter marches onward, thoughts of spring ski mountaineering objectives start to dance in our dreams. For many backcountry skiers, skiing one of the Volcano’s in the Pacific Northwest or a more wilderness-oriented traverse in the North Cascades or British Columbia or some of the well supported hut-to-hut traverses in the Alps; crossing glaciers is as much a part of ski mountaineering and its history as sliding down the mountains themselves.

A Google Earth screenshot of a glaciated Alaska Range.
Preparation and Planning
Recently, people are getting hip to using tools like Caltopo, Gaia GPS, and Google Earth for tour planning, but when it comes to drawing your intended route on the glacier, these tools are exponentially more valuable. These tools present satellite imagery that can show you where the most problematic sections of the glacier are. We know that crevasses move around season-to-season and decade to decade, but by drawing your intended route around the most heavily crevassed and tricky sections of the glacier, you are undoubtedly setting yourself up for success.
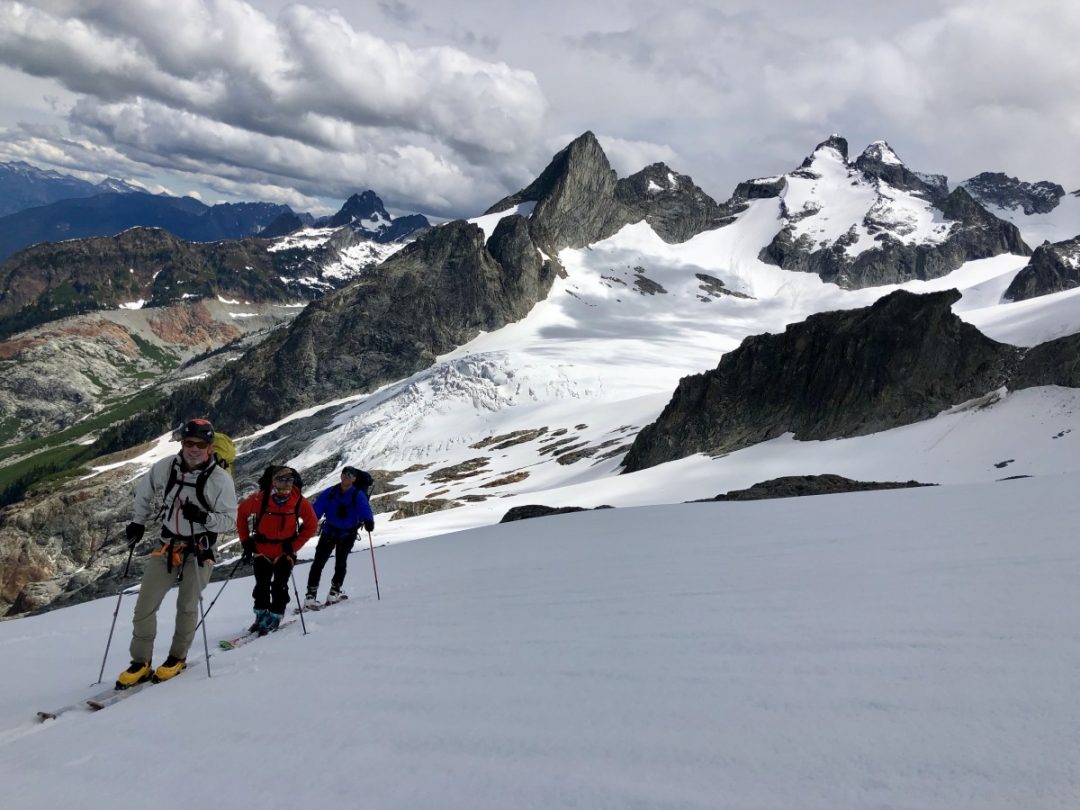
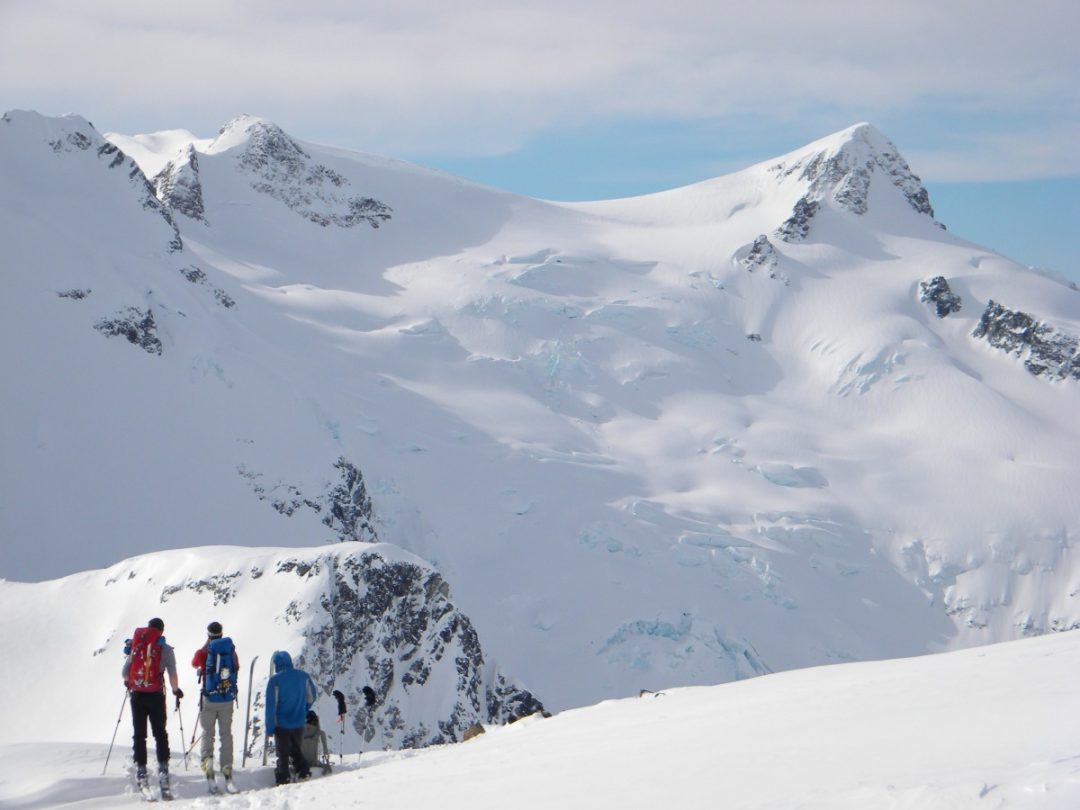
Particularly in North America, many classic multi-day ski traverses cross glaciers with no existing tracks. This requires even more diligence in planning, preparation and training, in addition to paying attention to conditions. Here is one such occasion as Nate Helweg, Doug Poortenga, and Ken Boggs cross the Dana Glacier on day 4 of the Ptarmigan Traverse. Credit: Ian Nicholson
Harnesses
When skiing or snowboarding on a glacier, every team member should have their harness on and a few carabiners ready to go no matter how “benign” the glacier seems. There are countless experienced climbers and skiers who fell into a small hidden crevasse that they were completely surprised by. While wearing a harness doesn’t guarantee an injury-free outcome, having a harness already on makes performing crevasse rescue infinitely easier than if it is stashed in your backpack.
Wear a harness while traveling on glaciers regardless of how benign they might seen. Tracey Bernstein skins across the Glacier de Cheilon below the Pigne de d’Arolla, Switzerland. Photo: Ian Nicholson.
Wearing a harness makes assisting others parties more manageable too. I once came across a skier who had fallen 60ft into a hidden crevasse and was able to quickly extricate him by dropping him a rope that, even though he was “quarked” into the crevasse. We would learn that he could not access his belay loop and was only able to clip the side of his waist belt of his harness with the carabiner that was lowered. As I hauled him upwards and he came out of the darkness, I saw him hanging sideways from the carabiner around his harness suspended from near his hip rather than his belay loop.
Even skiing something like the Watson Traverse on Washington’s Mt. Baker can frequently require a number of techniques to safely negotiate its complex (and often track-free) glaciers. Credit: Ian Nicholson
While in the Revelation Mountains of Alaska, Piolet D’or winner Graham Zimmerman fell into a small hidden crevasse on the Swift glacier after he had just made the first ascent of the West Face of Titanic while skiing around basecamp without a harness or backpack on. During the fall, he tore his ACL; it was quite the ordeal to extract him, which involved precariously tying the rope around his waist. The lesson is this: we all become complacent—even some of the most risk aware—wearing a minimalist harness on a crevasse can save your life and make life easier for those responding to a crevasse fall.
When traveling on glaciers, it is imperative there are at least two ropes in the group, even in groups of two. This is because if you happen to be unlucky and the person with the rope falls into the crevasse, your ability to save them is next to zero. The exact halfway point of the Spearhead Traverse near Whistler BC. Credit: Ryan O’Connell
Ropes
There should always be at least two ropes carried within the team, even with teams of twos. The idea is that no matter who falls into the crevasse there is always free (unweighted) rope on the surface to assist with the rescue.. While it might seem obvious, occasionally, teams of two only bring a single rope. If you stop and think about it, only one rope for a team of two means a 50-50% chance the person on the surface has the rope. Those are bleak odds considering that if the person falling in the crevasse has the rope, they cannot be saved promptly and have a high likelihood of dying.

If you think you are likely to belay, you need to bring a dynamic rope. While hyperstatic ropes like the RAD Line are suitable for glacier travel and crevasse rescue, Petzl does not recommend these ropes for “belaying from a fixed point”. Photo: Ian Nicholson
Rope Selection
So how much rope should you carry? Two 30m ropes is a good start and will get you through most ski terrain. While a half-rope (not a twin rope) is not technically rated for single use in steep terrain, it is okay for use as a single strand for steep snow climbing or crevasse rescue. These ropes generally run from 7.5-8.5mm in diameter. While a twin rope is typically lighter weight, it isn’t as strong as a half-rope, and isn’t intended for use in situations when it is loaded as a single strand.
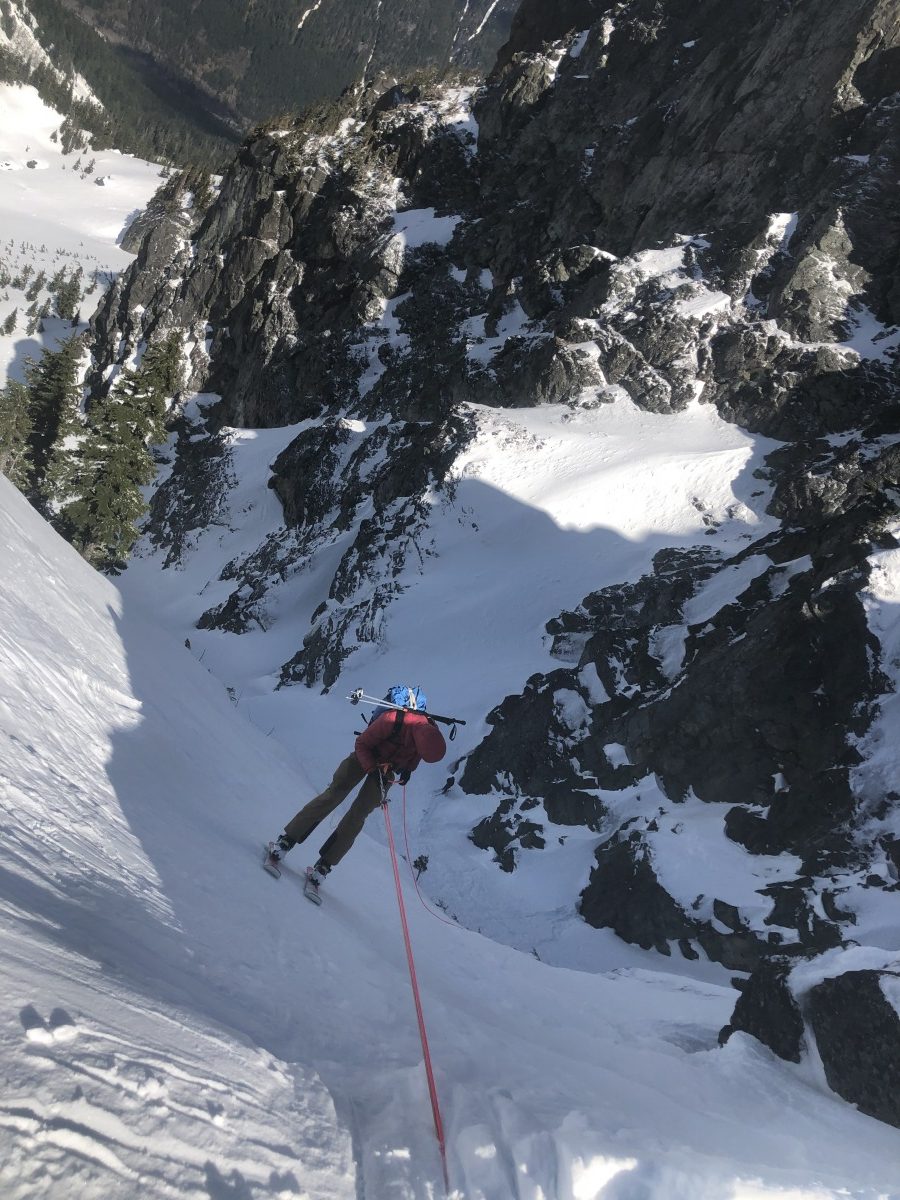
While RAD lines and similar ropes are not suitable for belayed skiing they are suitable for rappelling. Here Zack McGill rappels into the Snot Couloir near Snoqualmie Pass. Photo: Ian Nicholson
There are several ropes similar to the Petzl RAD line, a 6mm rope weighing only 22g per meter, but is a ultra-strong (rated to 12kn), hyperstatic rope designed for glacier travel, rappelling, crevasse rescue, and other applications not involving a belay from a fixed point. If you plan to belay any sections of your tour rather than climbing or skiing, use a dynamic rope and not a RAD Line or similar rope.

For more complex tours that involve both glacier travel and have the potential to require some belayed sections of skiing, it is a good idea to bring one dynamic half-rope and one hyper static rope: such was the case skiing the Aussie Couloir near Pemberton with Adam Fabrikant finishing up the day down the Anniversary glacier. Photo: Ian Nicholson.
A rope strategy I’ve used regularly on complex ski mountaineering traverses and descents is to have one 30m RAD Line in the group and one 30m or 40m dynamic half rope. Either rope can perform crevasse rescue, you gain some weight and space savings from the RAD Line, but the dynamic rope can be used to belay any sections that might require it. The decision to bring the 30m or 40m rope depends on the complexity of the tour.
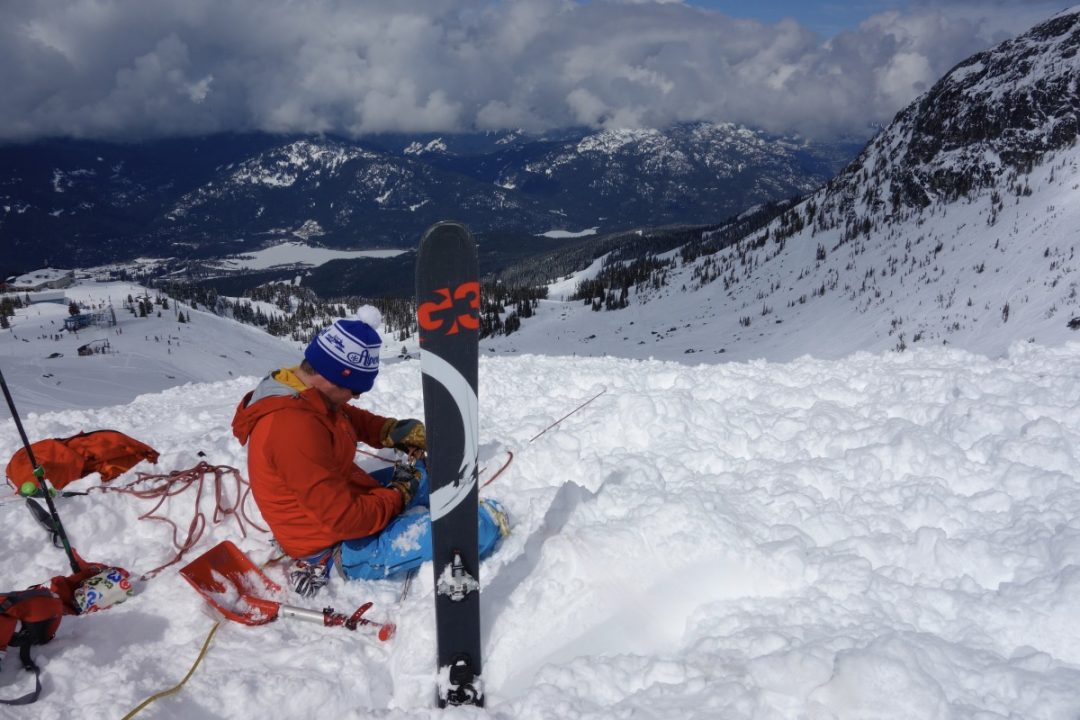
While transitioning from skiing to skinning or skinning to skiing, it is a good habit to remove one ski at a time. As we all know, skis distribute our weight over a much larger area which reduces our likelihood of falling in a hidden crevasse. This practice only eliminates the time you have both skis off, reducing your chances of “trap dooring” into a hidden crevasse. Here Pete Keane leads his group down Cevedale in the Ortler mountains in Northern Italy. Credit: Ian Nicholson
One ski at a time
Another technique commonly implemented while traveling on glaciers is to remove one ski at a time. We all know our skis distribute our weight over a much larger area than our boots do, and that dramatically decreases (but doesn’t eliminate) our chances of falling into a hidden crevasse. So when taking a break or ripping or putting on skins, do them one ski at a time, completely clipping into the ski before removing the second. There are countless stories of people punching one foot into a dark, bottomless hole while still clipped into the other ski and at least one person left hanging from a single ski.

When transitioning on glaciers it’s always a good idea to only remove one ski at a time, here Nick Pope leads the group after a transition on the heavily crevassed Jungfraujoch Glacier in the Berner Oberland, Switzerland.
Probing
If there are strange-looking features that look difficult to avoid or circumnavigate, then PROBE before committing to them. Better yet, have your partner quickly put you on belay before committing to the suspect feature.
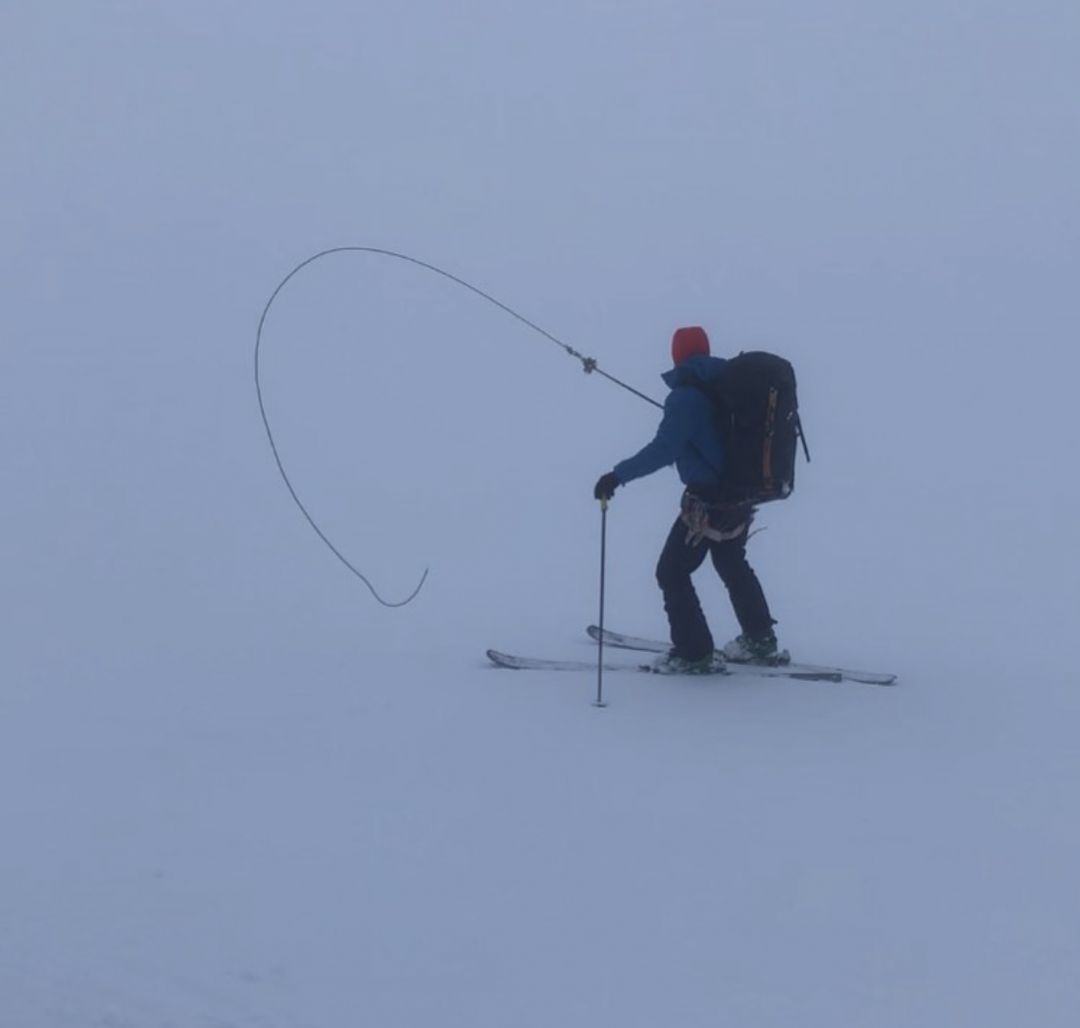
Low visibility is the number one reason to rope up, particularly while ascending. Here Ian Nicholson goes “fishing” (attaching a cordallete to his ski pole and whipping it along to help get depth perception) on Day 4 of the Isolation Traverse while descending the Neve glacier in the North Cascades. Photo: Nate Helweg.
When to rope up
I travel unroped most of the time when traveling on glaciers with skis or split-boards on feet. The fat spring snowpack and the added flotation combined with good visibility, let me see strange-looking features, and allow for spending most of the day traveling unroped.
The next most common reason you might need to rope up is to investigate (AKA probe) or cross tricky or suspicious looking features that cannot be easily circumnavigated as is the case here as Avalanche Hour host Caleb Merrill belays the group over a suspicious looking feature on the Park Glacier. Photo: Ian Nicholson.
If visibility decreases or there are several suspect or irregular-looking features in the snow, then roping up enters my mind. While skinning, I am quicker to rope up, as the downsides are minor—we travel a little slower, you have to wait at turns, but generally, it’s only a minor inconvenience.
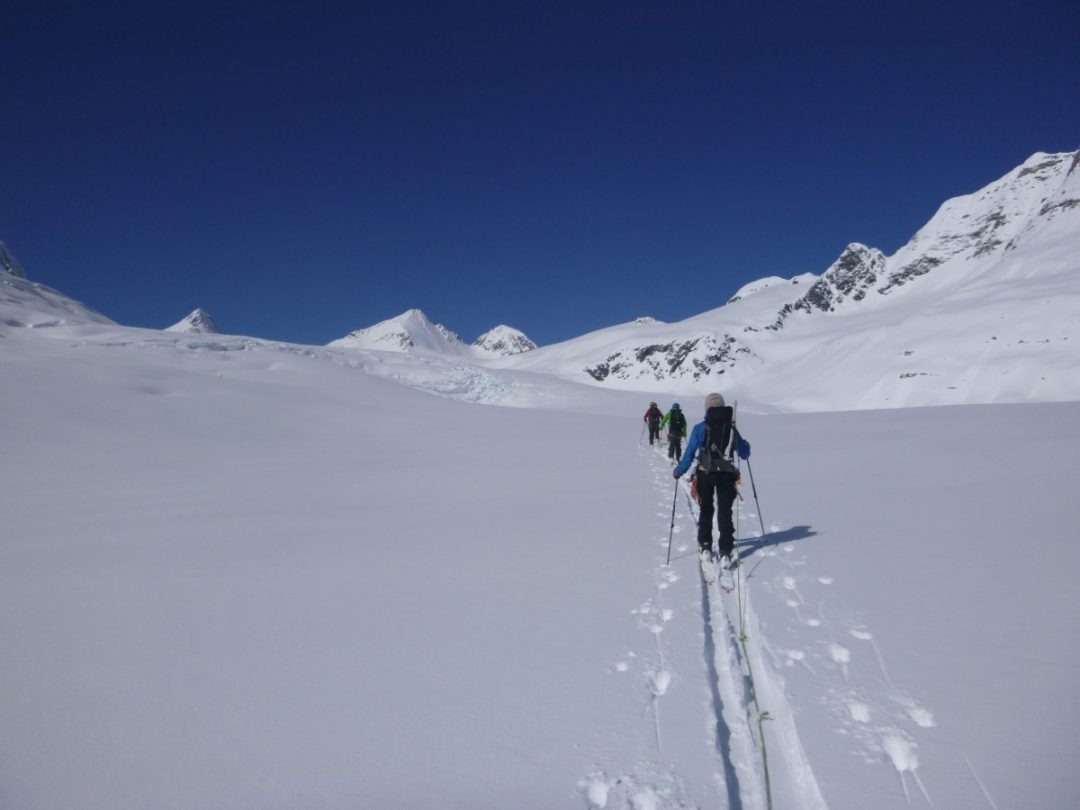
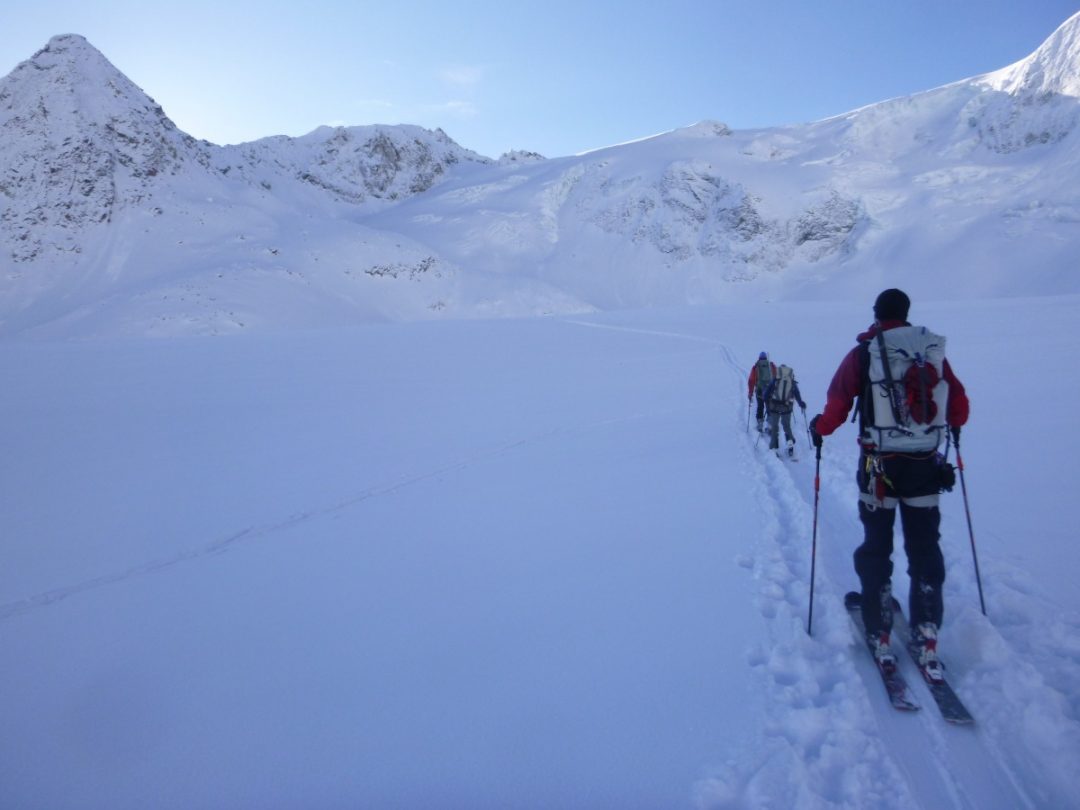
Sometimes you just need to rope up. On the way up where there are few downsides, there shouldn’t be too much hesitation as it doesn’t slow you down, particularly in mellower terrain with few kick turns. Here the group is roped up on the Worthington Glacier near Thompson Pass, Valdez AK. Photo: Ian Nicholson.
Roping up while skiing or snowboarding can lead to serious injury. You can imagine two or more people tied together turning in different directions; they can unexpectedly pull very hard on one another. For me to consider roping up while descending on skis, the threat of falling into a hidden crevasse must be greater than the danger of skiing while tied to another person. If we rope up while descending, it also means that once it is time to rope up, we ski/snowboard WAY WAY slower. Anytime you ski downhill rope together, you should be taking super-controlled, snow-plow type turns.

Roping up while skiing down is a more difficult decision since the potential for injury is so great. A good technique is to start with only two people roped together and have the rest of the group ski in the first two people’s tracks. Once three people have tied together to ski downhill, the risk of injury increases. It should be noted that if you do find yourself roped up to “ski down,” everyone should proceed VERY slowly and controlled. Pete Keane on the edge of roping up in nearly whiteout conditions on the Stockji Glacier on the final day of the Haute route. Photo: Ian Nicholson.
Knots
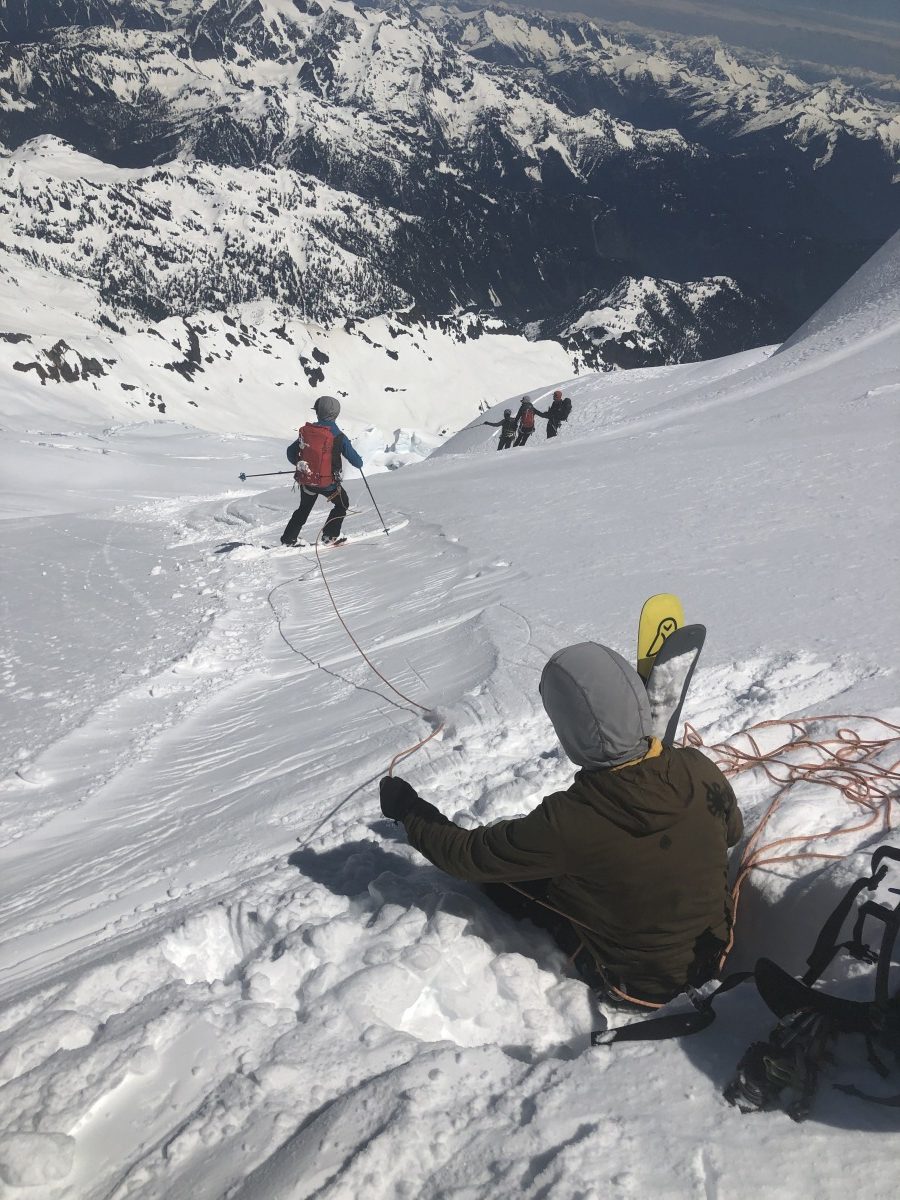
The spring snow conditions skiers often travel in are some of the most effective snow types for stopper knots. Stopper knots are typically alpine butterfly knots, but can be any number of other bulky knots that start around 2m from each person and are subsequently tied every 1-2m after that. The knots can assist in catching, or even completely catching, a skier should they fall into a crevasse. The value of knots in a rope for use with skiers traveling on a glacier cannot be overstated, as a skier’s ability to “self-arrest” is more compromised than climbers with crampons and an ice axe when conditions firm up. It does mean that a typical direct line haul style rescue system is not an option, and either a drop-loop system or a New-Strand Directly Haul must be implemented.

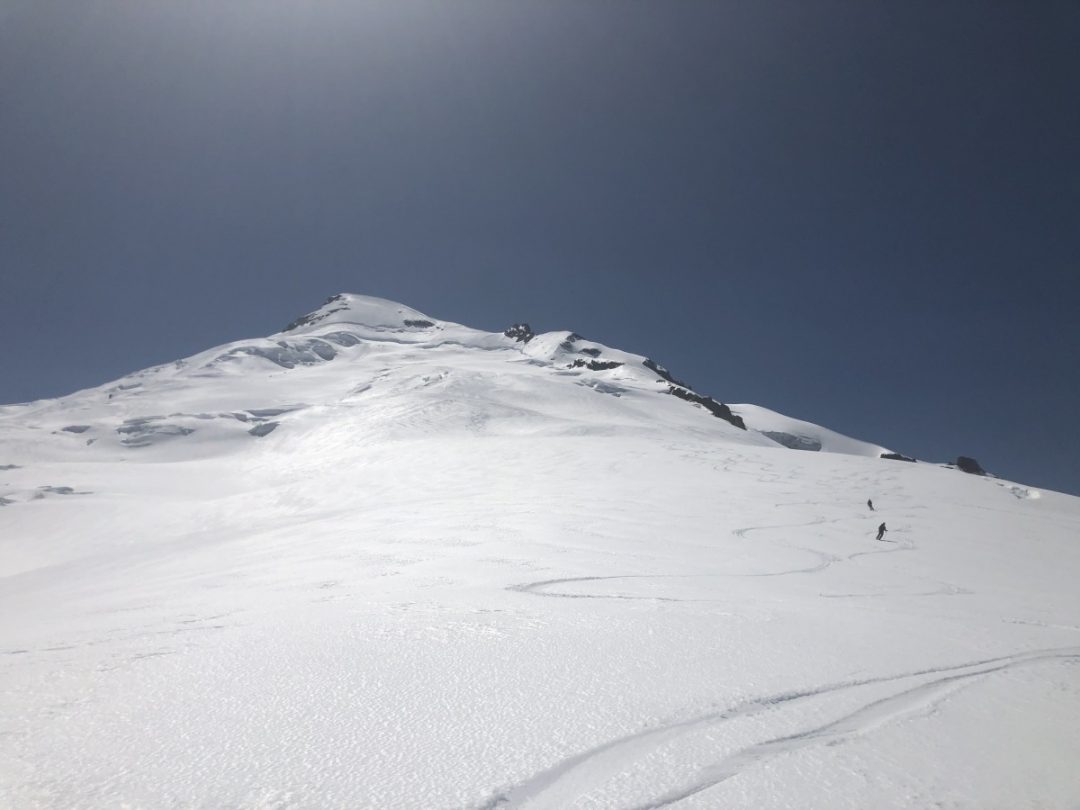
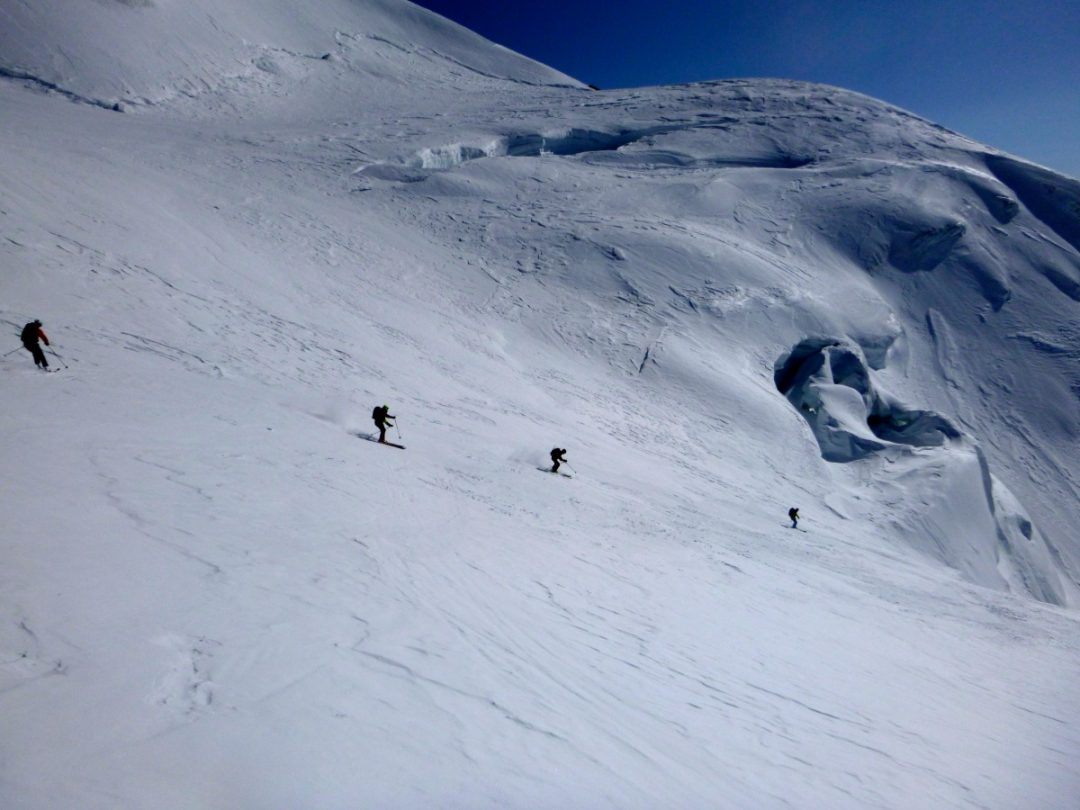
Using knots in the rope while roped up for glacier travel is an extremely effective technique for skiers while traveling on glaciers because of the conditions commonly found on glaciers in the spring. The knots are actually likely to either completely catch the fall themselves or at least make it far easier for the person still on the surface to catch the all. This means you’ll need to know a few different forms of crevasse rescue, as a direct line haul will not be an option. Skiers ascend the Coleman glacier on Mt. Baker Photo: Ian Nicholson.
Roping up (or not)
Depending on the weight and skill level of the people skiing on the glacier, a good first option is for only two people to rope up with lots of butterfly knots in the rope. If more people are remaining, they can ski in the tracks of the two people who skied down first. If there is a large weight differential, as in the heaviest skier is unroped, or there is a question in rescue skills, consider putting three people on the rope. This, however, exponentially complicates things compared to two people if the terrain is anything other than relatively low angle, smooth, planner face.
Just like you shouldn’t go into avalanche terrain without taking an avalanche course, you should strongly consider getting some sort of training on glacier travel and crevasse rescue prior to a tour that requires it. Photo: Josh Cole.
Crevasse rescue equipment
Besides bringing a rope and wearing a harness, the need for the right equipment to perform a crevasse rescue and the skills in order to be able to execute are critical. There are lots of products like a Petzl Nano Traxion, Edelride Spoc, or the Petzl Tibloc that make performing crevasse rescue far easier. If you are planning a trip requiring glacier travel, much in the same way that you would take an avalanche course before going into avalanche terrain, you should seak glacier travel and crevasse rescue training prior to any trip that involves crossing glaciers.

Understanding where crevasses are more likely to form is a critical skill for any ski mountaineer. The group avoids convex rolls where crevasses are more likely to form in the Bern Oberland, Switzerland. Photo: Ian Nicholson.
Convex rolls
Crevasses are just cracks that slowly open and close in the glacier that are formed as a result of stress as the glacier moves down hill. A classic and easy to visualize analogy of where crevasses are most likely to form is a snickers bar. When you bend the snickers bar downward, it creates cracks at the point of stress at the apex of that convex roll. Conversely, in a concave roll (or a compression zone), the cracks push back together. When you turn the Snickers Bar right or left, small cracks form on the inside of the turn and large cracks on the outside. Another big factor, besides the general direction the glacier is flowing, is the bed surface beneath the glacier. If there are underlying rises or irregularities causing cracks in the ice, this too will be a place where crevasses are more likely to form.

While it does take some additional investment in equipment and training, ski mountaineering in glaciated terrain can open up some incredible adventurous, wild, and remote locations. Here Chris Marshall skis down beside the Mattier Glacier inBritish Columbia. Photo: Josh Cole.
This article covers just some basics about skiing and snowboarding on glaciers, if you want to learn more, consider taking a ski-mountaineering course with an AMGA Certified Ski Guide in your local area.
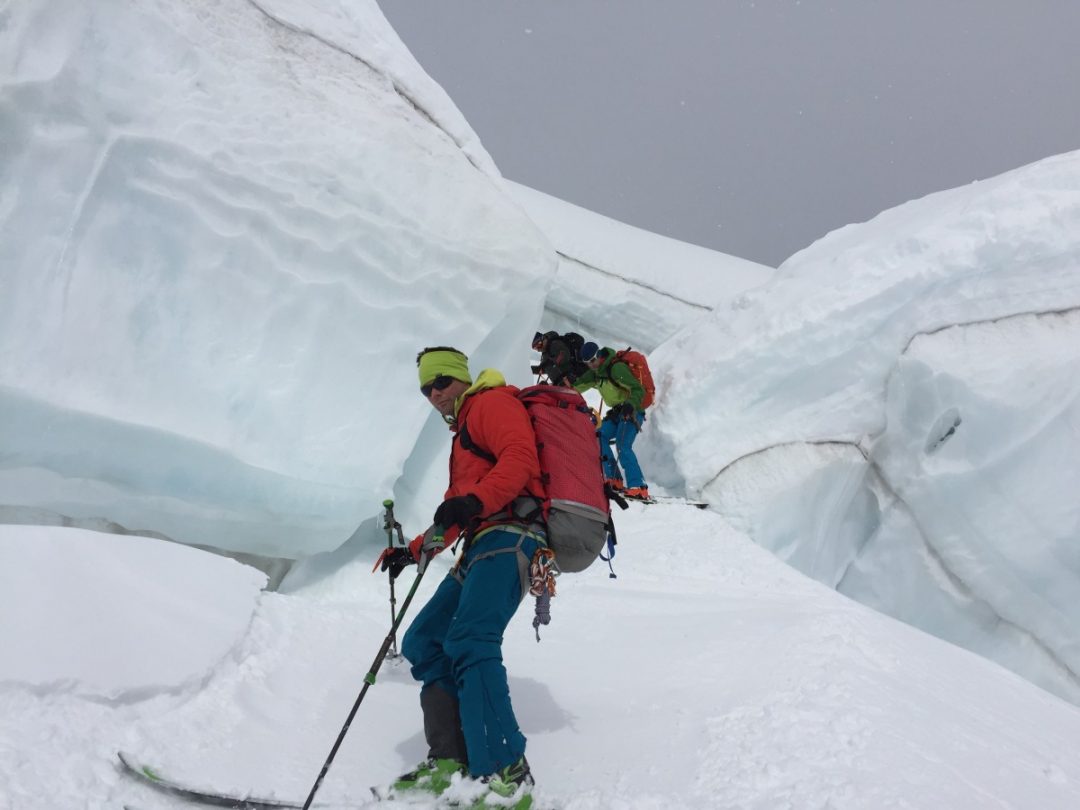
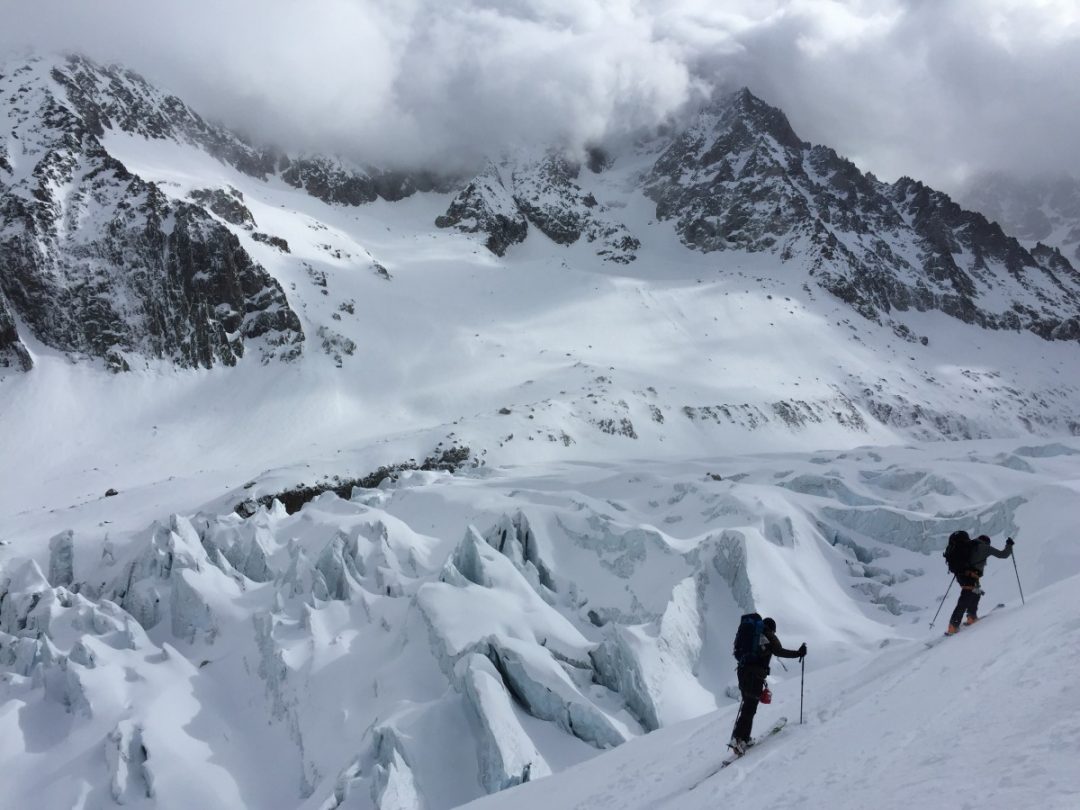
This article covers some basics about traveling on glaciers. If you want to learn more consider taking a ski-mountaineering course with a AMGA Certified Ski Guide in your local area. Here IFMGA guides Ian Nicholson and Dale Remsberg sneak through crevasses off the Aiguille du Midi near Chamonix France. Photo: Jen Vogt.
Coming soon…..
Various ski-focused crevasse rescue techniques coming in a future article.
Here’s a link to WildSnow’s glacier travel archives.
Ian Nicholson is an internationally licensed IFMGA/UIAGM mountain guide based in Washington.