Tim, Gary, and I made the plan to head out for a sunset ski. With that in mind we planned accordingly to make sure the slope we planned to ski would get the last light, and be set in front of the Gore Range. For this shot I threw a snowball in the spot where I wanted Tim to make a turn. Camera: Canon 7dmkii with 70-200f2.8 at 1/2000, f7.1, ISO 800 at 70mm Skier: Tim Dyer
Timing, camera settings, communication and more
Words and photos by Scott Bellow
Picture this: you’re on a slope, lining up a photo from a spot above or below that you’ve deemed safe. After a three hour skin, you and your partner are exhausted but excited. You look up at your friend, who’s standing at the top of the line. You radio for him to “Let ‘er rip!” in hopes he can really nail the left footer in the spot you told him to. His skis dig deep in the powder and the lower three-quarters of his body disappears into the snow. A few shutter clicks later, it’s over.
You take a quick look at the camera and start to smile. After packing up your gear, you ski to your island of safety where your partner is waiting for you. You high five him and say “We got it!” Suddenly the hours of mapping, communicating plans, failed attempts and foiled plans are all forgotten.
Over the past several years, I’ve worked hard to hone my ski photography skills. That work has landed my photos in big publications like Backcountry, Powder, Freeskier and Ski magazines, in addition to commercial shoots for ski brands. Being noticed by such publications has been the challenge that fuels this passion and has taught me so much along the way. Creating a magazine-worthy ski image is not easy endeavor. Here are some tips to help you get started.
Plan ahead and know your location
If you’re looking for a landscape image, say at sunrise, it is essential to know the aspect of the slope you’re skiing and when it will get first light. CalTopo is a great tool for this purpose. There is an option called “Sun Exposure” that allows you to choose a specific time and day to see when the sun will hit the slope you’re going to shoot and ski. Talk about it with your athlete at home prior to heading into the field to make sure the vision aligns.
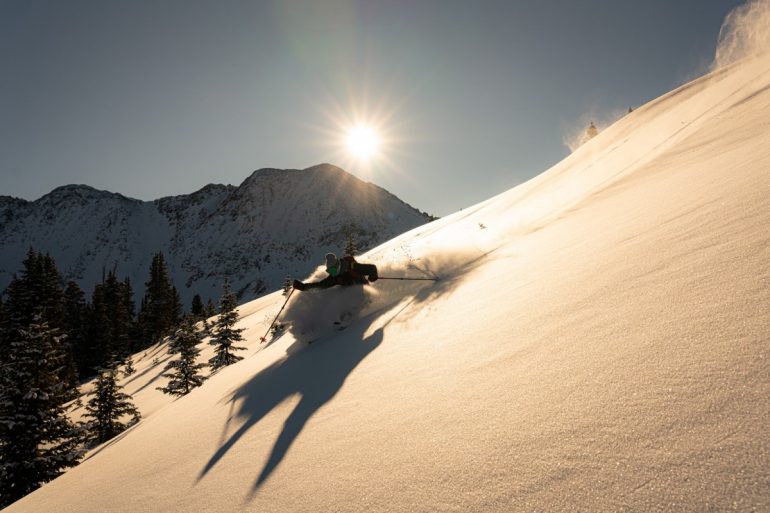
Using Caltopo, we knew the sun would come over the peak at 9:15am and illuminate the NE facing slope. To line up this shot I told Bryan to make his turn halfway between me and the little pine trees, and 20 feet uphill and across the slope. Camera: Sony A7Riii with 24-105f4 at 1/2000, f6.3, ISO 200, at 27mm. Skier: Bryan Finnochiario
Choose the right ski partner/athlete
This is crucial to creating an appealing ski image. They need to have good form, and know what it takes to look good while skiing. Besides being a good skier, the athlete and the photographer need to communicate effectively. The skier needs to understand what the photographer is looking for. It is helpful to explain what lens you’re shooting with so they know how far they need to be from the camera.
For example, if shooting with the 24-70mm and the skier is coming towards me, I’ll say “We’re shooting with the short lens so make sure you’re deepest turn is within 30ft of me.” If we’re shooting with the 70-200mm I’ll give them a longer distance range so they know how far to be from me. It is common for photographers to throw a snowball to show the skier where they should make their turn. This works but can also ruin the blank canvas if the skier misses the mark.
The photographer needs to also understand if the desired image is even possible, another instance where good communication is important. I always ask the skier if he/she can ski the slope in the way that I am looking to shoot it. Will they have enough speed? Does the shot angle work with the fall line of the slope? Are they comfortable doing what I’m asking of them? Don’t choose an athlete that is stepping out of their comfort zone and ability solely because they want to get the shot. These points are the backbone of any good ski image, without them it will be difficult to execute.
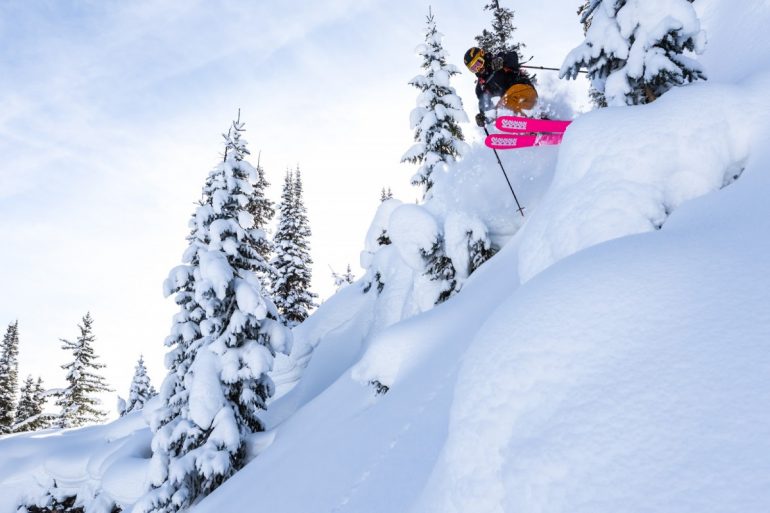
Chris Bivona landed on my foot while shooting this image, because I told him that to make this shot work his jump angle would have to be right at me. The trust in him and effective communication made this shot work. Camera: Canon 7dmkii with 16-35f2.8 at 1/1600, f4, ISO 125 at 16mm. Skier: Chris Bivona
Have the right gear
If you’re in the backcountry, have the essentials i.e. beacon, shovel, probe etc. Going back to communication, having two way radios is a huge asset. I use the BCA Link radios with my subjects. Not only are these important for letting each other know when you’re ready, but as the photographer you may see something you didn’t before, and it is very convenient to be able to talk back and forth so easily.
For camera equipment, I highly recommend a body that can at least shoot 10fps, like the Canon 7D Mark II. This is crucial to acquiring the perfect pole plant, or getting rid of a wonky ski. On any given day I carry the Canon 7dmkii, 16-35 f2.8, 24-70 f4, and 70-200 f2.8. I also bring along lens hoods, a microfiber towel and neck strap in case I need to ride with the camera out. I have tried every pack out there and always go back to the Osprey Kamber 42L fitted with an internal camera unit made by F-Stop or Shimoda designs. Over time I have learned that the camera packs made specifically for skiing are less comfortable and do not carry technical ski equipment as well as a real ski pack, like the Kamber. ALWAYS CLOSE YOUR PACK WHILE SHOOTING AND PUT IT BACK ON!
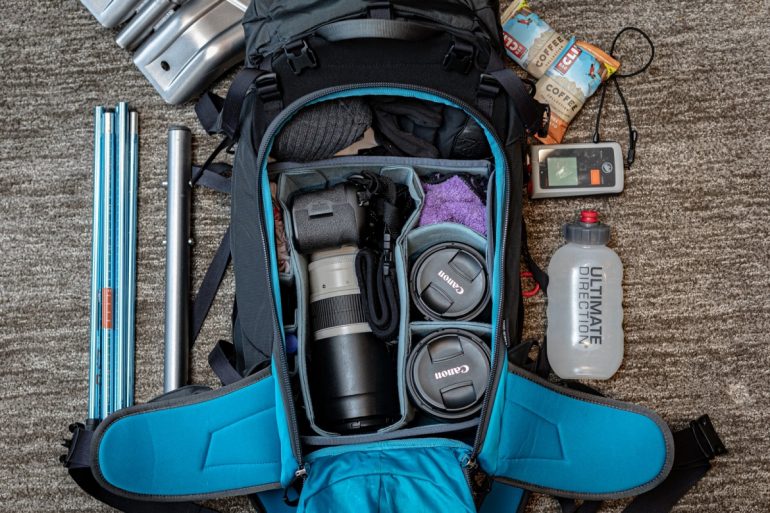
The typical kit for a day of backcountry shooting.
Camera Settings
Shutter Speed: As a rule of thumb when shooting action, I never let my shutter speed drop below 1/1000. When the skier is coming directly at you, this will be a fast enough shutter to freeze the action. If the skier is skiing past you, and you’re shooting across slope, it is important to remember to raise the shutter speed as he/she will be coming by you at a much faster speed. In these instances I usually use a minimum shutter speed of 1/2000.
Aperture: Most of the time when shooting the skier coming at you, or past you, keep your aperture between f4-f7.1. Again this can change depending on the scene and available light but it is always good to keep your aperture a few stops up from wide open. This allows more wiggle room and will increase your chances of getting tack sharp images while creating good depth of field. If you’re creating more of a landscape image from a decent way away, you can raise the aperture up to f11 to ensure the entire scene will be in focus. This will also allow you to drop your shutter speed slightly because technically if the skier is further away, it does not require such a high shutter speed to freeze the action
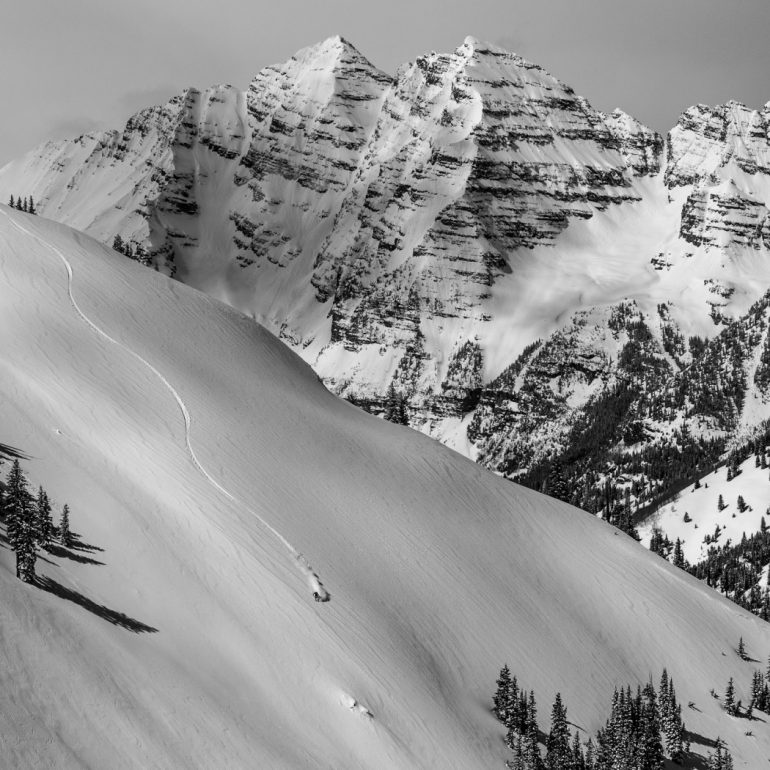
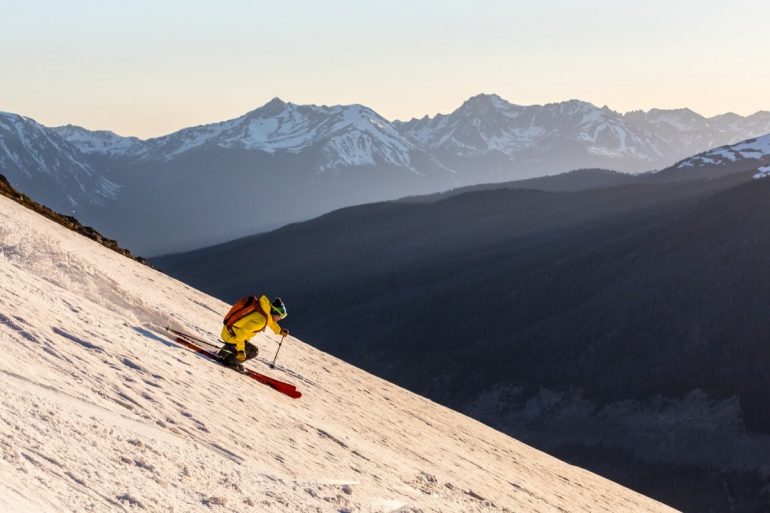
The same rules for Landscape photography apply to a landscape type ski photo. You should use a higher aperture to allow for sharpness throughout the entire image. For this image I manually pre-focused on the rocks just below the skier, made my composition and made sure to not move the camera as the skier descended the face. Camera: Canon 7dmkii w/ 70-200f2.8 at 1/1000, f9, ISO 320 at 85mm Skier: Andrew Benaquista
ISO: This setting will be based off of the needs of the shutter speed and aperture. Set those first, then see where your ISO lands. You need a high enough shutter speed to freeze the action, and the appropriate aperture for the scene you’re shooting. Most of the time I will use Auto ISO to see where it falls in reference to the other settings. If it is too high for my threshold of acceptable noise/grain I will lower the aperture. I normally won’t risk lowering the shutter speed as I would rather have a sharp/noisy image than an unsharp/un-useable image.
Focus: Use back button focus! This takes the focus away from the shutter button and allows it to only be a light meter. Now that it is separated you can recompose shots and track subjects through your frame without risking pressing the shutter halfway and taking the shot. On Canon cameras, I find it ideal to make the “AF-On” button on the back of the camera to be my focus button.
Mode: For Canon cameras, you should always be in “AI-Servo” when tracking subjects. This will tell the camera to adjust focus as you’re shooting and the subject is coming towards you. In this mode you can hold down the dedicated focus button and it will track the skier throughout the frame.
Focus Points: There are many options when choosing which focus points to use. These range from “Zone,” where the camera will decide where the subject is for you, or “Single Point,” where you manually place the point over the skier and track it through the frame. I like to use the “Expandable Points,” which is a single focus point with four other points surrounding it. This will give you some wiggle room if while you’re tracking the skier, it becomes difficult to follow with just one point.
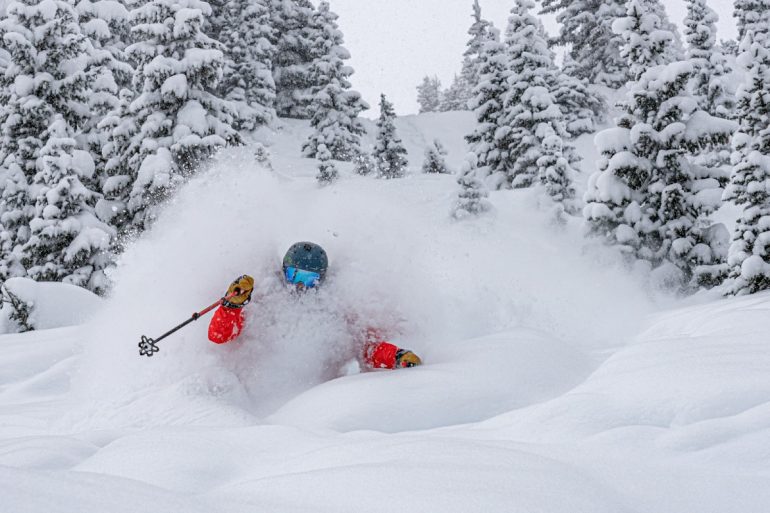
If we’re lucky enough to have powder this deep, sometimes I’ll just tell the skier to ski straight at me and I’ll track them throughout the whole frame until they pass me. I kept my active focus points in the lower ? of the frame to allow more room to the right to balance out the image. Camera: Sony A7Riii w/ 24-105f4 at 1/1600, f7.1, ISO 400, at 69mm Skier: Bennett Levine
Point Placement: Remember your Rule of Thirds when tracking subjects. It is easy to just place your focus points in the center of the screen and fire away. Think of where you want the skier to be in the frame and move your focus point to one of the upper or lower thirds to create a more appealing image. It is important to leave room in front of the skier in the direction they’re heading.
Exposure: Snow is very white and can trick your camera’s light meter. If you shoot in Auto, the camera will make the snow look gray. In certain situations where it’s dark and gloomy and you want to show the texture in the snow this can work, especially for black and white images. If your end goal is to make the snow look very white you’ll have to overexpose the image. You can do this by shooting in manual mode, or use exposure compensation and go up to +1 stops to get the snow to be a true white. Again it all depends on how you want your final image to look, but just understand that your camera sees white snow as a darker gray.
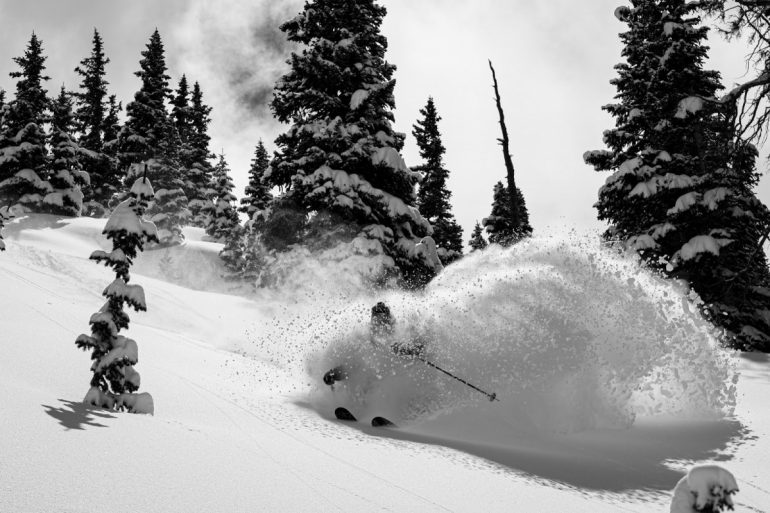
Black and white images are a great way to show texture in the snow. Knowing how I wanted the final image to look, my goal was to have the snow to look white, but not overexposed. It’s a fine line! Camera: Canon 7dmkii with 24-70f4 at 1/1600, f7.1, ISO 125, at 70mm. Skier: Gary Fondl
Behind every successful ski photo is hours or even days of work, nailing the settings and clicking the shutter is the easy part. It takes creativity, planning, clear communication, good weather, and a little sprinkle of luck. Ski photography isn’t just “point and shoot.” It takes a level of patience and skill that can only be developed after time and lots of practice. Even after all these years of practicing professionally, I still learn something new everyday. Hopefully following these tips will help stir your creative juices as they have mine.
Scott Bellow is a freelance photographer residing in Vail, Colorado with a passion for ski photography. He has been featured in Backcountry Magazine, Powder Magazine, Freeskier Magazine, Ski Magazine, and in ads for Oakley, RMU, The Phoozy, Never Summer Industries, Gordini, Sync Performance, and Bomber Skis/Bode Miller. Visit https://scottbellow.com/ for more images.
Beyond our regular guest bloggers who have their own profiles, some of our one-timers end up being categorized under this generic profile. Once they do a few posts, we build a category. In any case, we sure appreciate ALL the WildSnow guest bloggers!