As part of our Dynafit Tech Tips series, we bring you tips and how-tos to make sure you get the most out of your gear.
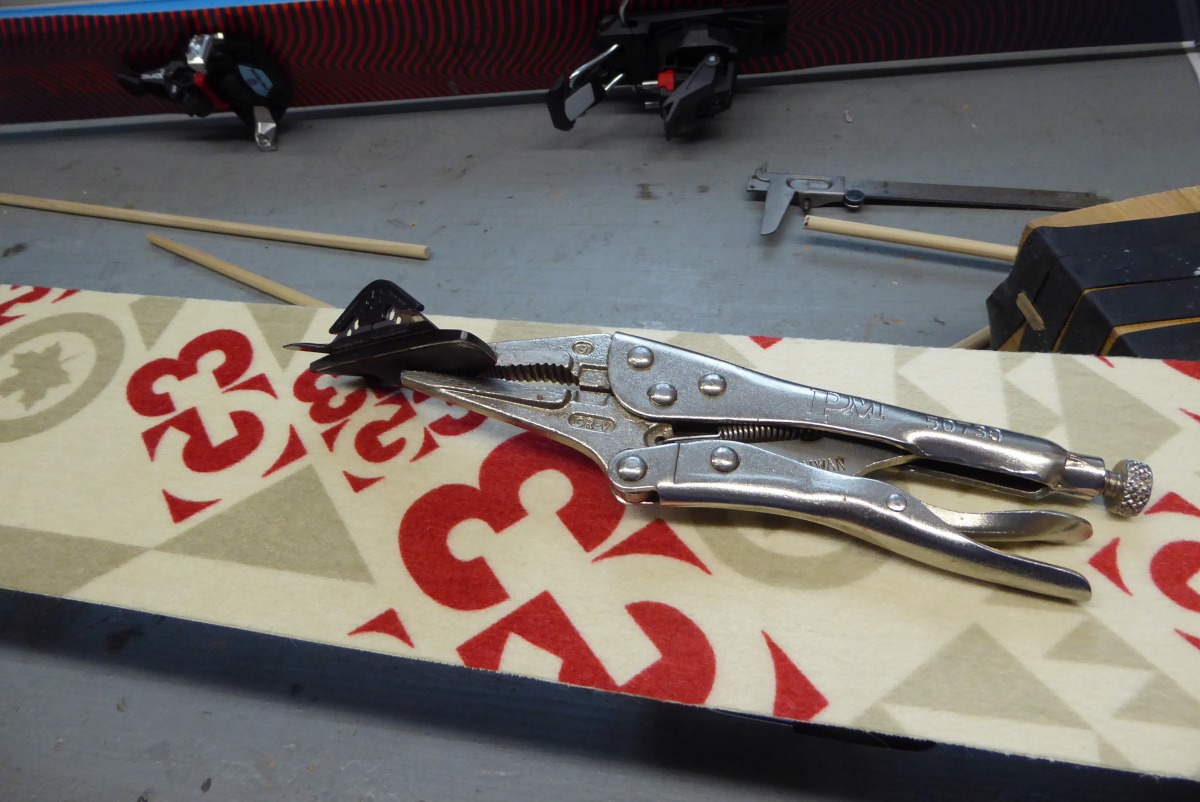
Skin cutting tricks include using the right cutter, gripped with clamping pliers. Dip cutter in water to help it slide against the skin glue.
For a good DIY: close attention and sharp objects
I’ve cut a lot of skins. I have screwed up cutting a lot of skins. Centering them before the cut almost always challenges me. I’ll get the tip hooked, then carefully stretch, try to nudge the skin to one side or the other by eye, hook the tail (if there’s a tail fixation), and I’m still 4 millimeters to the side. A skin will function with the sidecut is off by that amount, but not nicely, because it’ll require more care and time to keep from covering up one edge when you re-apply in the field.
Some of you shop guys probably have cool tricks for centering the skin before you cut. Please share. Below is my upgraded procedure, which I’m embarrassed to say is probably method number 85 (starting with the days when skis were almost all the same width, and had so little sidecut all we did was cut the skins to length).
Cutting the skin tip shape.
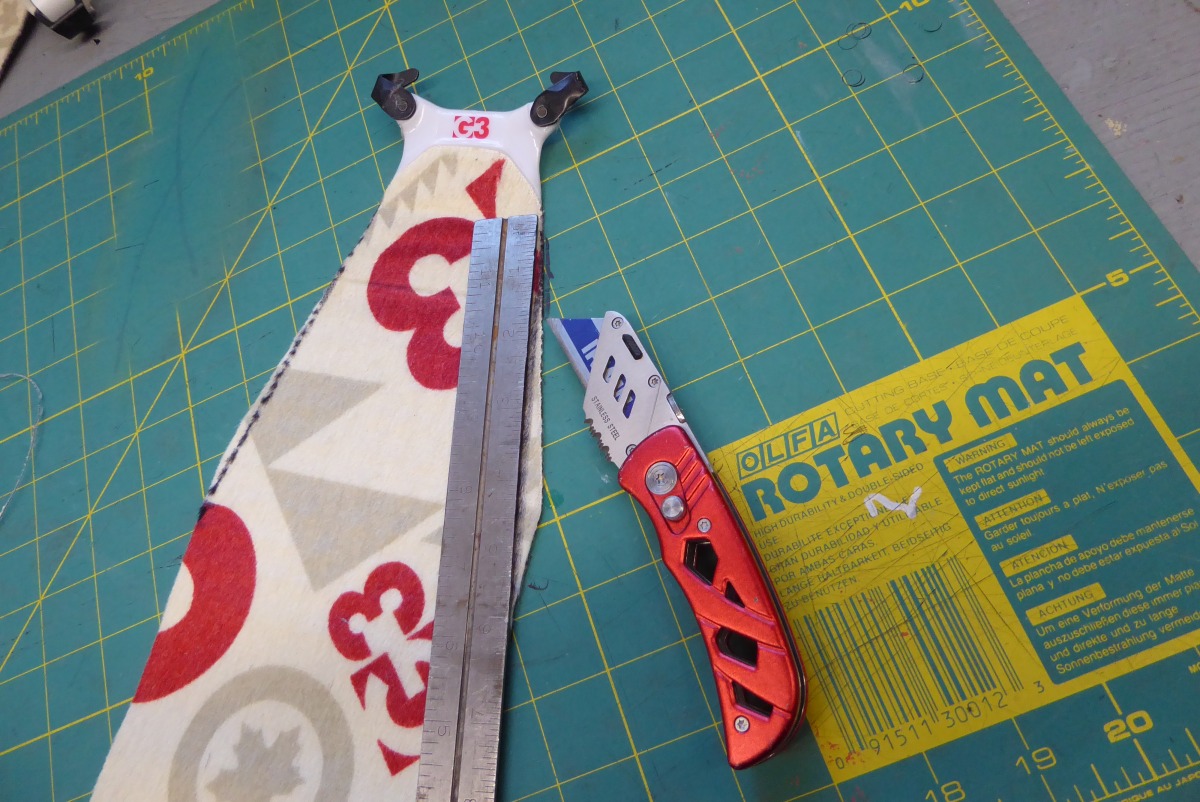
Step 1: cut the skin tip shape
Sometimes you’ll need to do this — while sometimes the factory cut will be okay. My method: First, I strap the skin to the ski and determine the shape I want, usually just marking with small dots as making the straight lines is easier without the skin curving over the ski tip. There are many shapes you can cut into a skin tip, I won’t get into that here. Suffice it to say I usually look for a template that’s included with the skin. And, or, draw lines with a straight edge from the sides of the tip hook out to where I think the skin should meet the skis edges. Next, and here is the important trick, I remove the skin liner and stick the skin tip to a plastic cutting board as pictured here. I then make the tip cuts with a straightedge and scalpel-sharp utility knife. Before pulling the skin off the cutting board, I brush away all the fiber scraps from the cut, so they don’t contaminate the glue. Yes, you can do this with scissors while the skin liner is attached. I never get “factory” results with scissors, but be my guest.
Skin cutting might begin with configuring-cutting the tip. In the case of this particular pair of G3 Minimist, the tip shape was already perfect.
‘Lou, you nut case, what is this?’ Yes Virginia, you have a right to ask. Read on below.
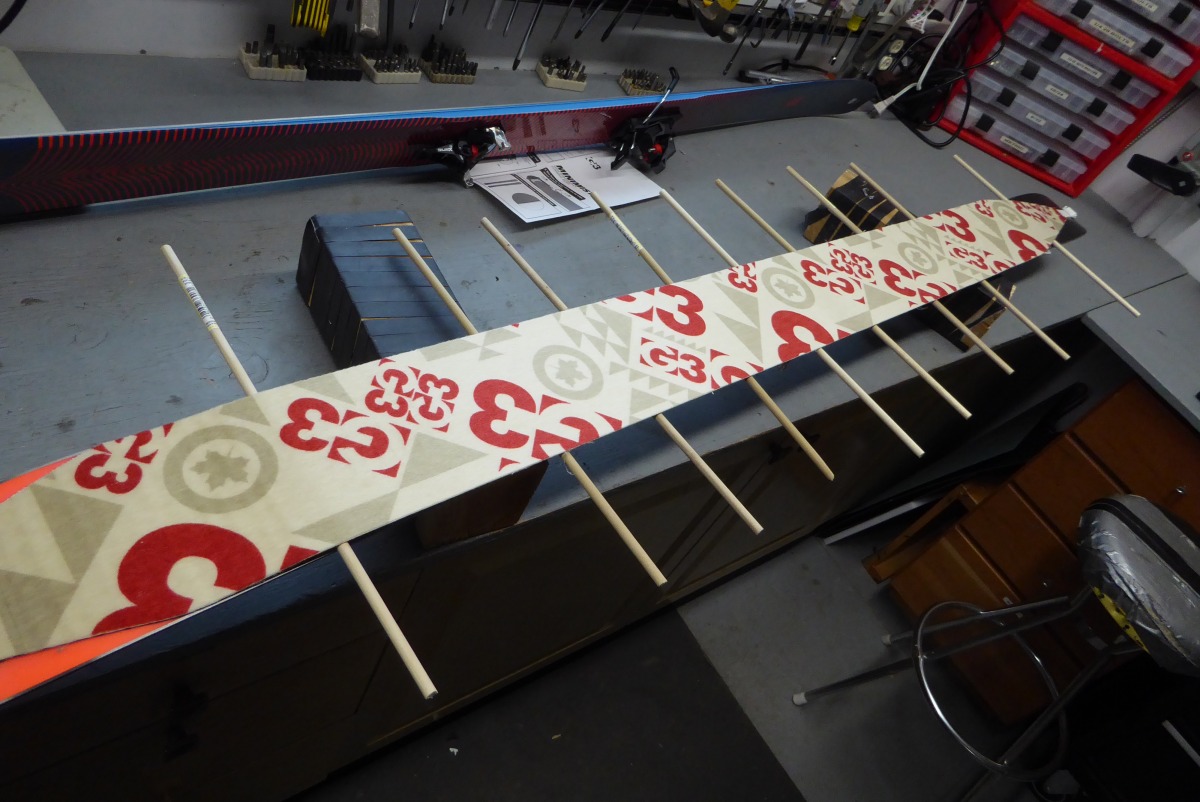
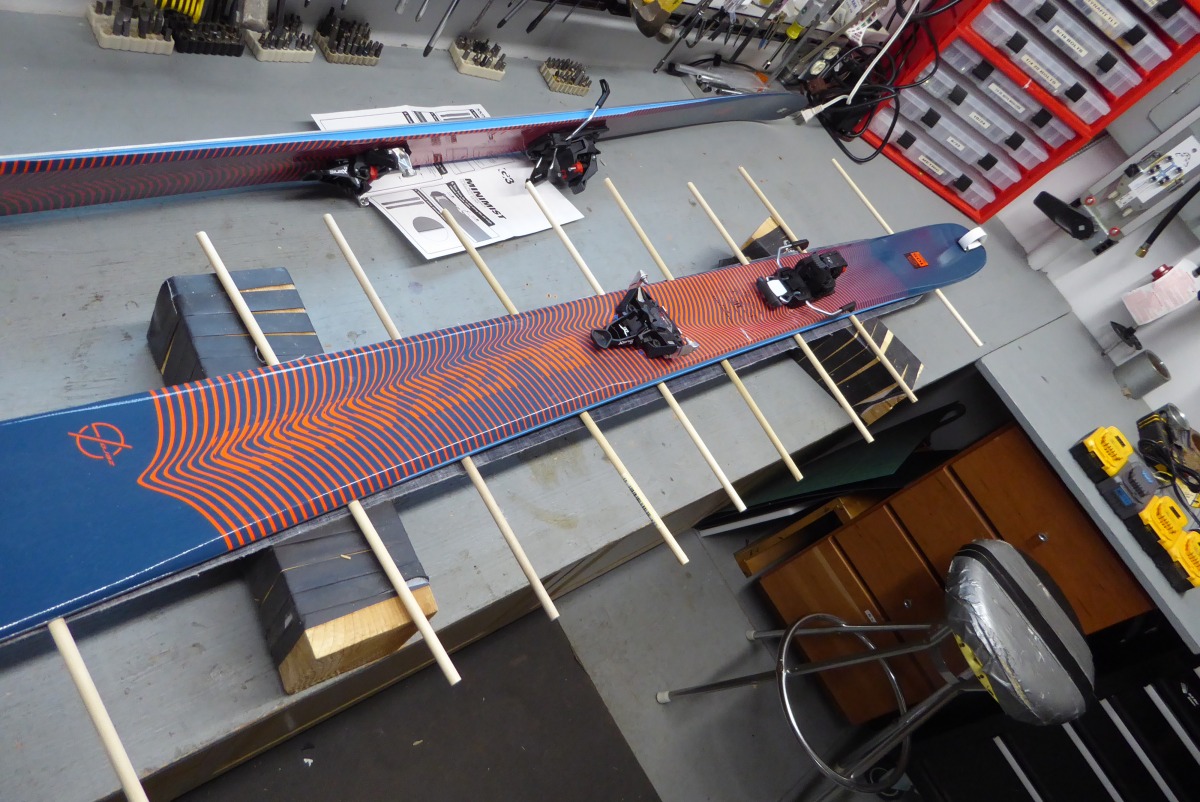
Step 2: secure and center the skin
Here is the deal. I am totally sick of fiddling around with trying to stretch a skin onto a ski, and stick it down nicely centered for a trim. So hearkening back to my alternate profession of carpenter, I fell back to how I used to position laminate countertops while using contact adhesive, as well as how I position prints for dry mounting. Simple, really, just a series of wooden dowels that keep the glue separated while allowing the work to scoot around. When the position is correct, you press down on the center area, stick it, then work out to the edges while pulling the dowels out. It’s helpful to wet the dowels with water, so they don’t stick too strongly to the skin glue. Remember that step. If the dowels don’t come out easily, you’ll pull the skin off-center while you remove them
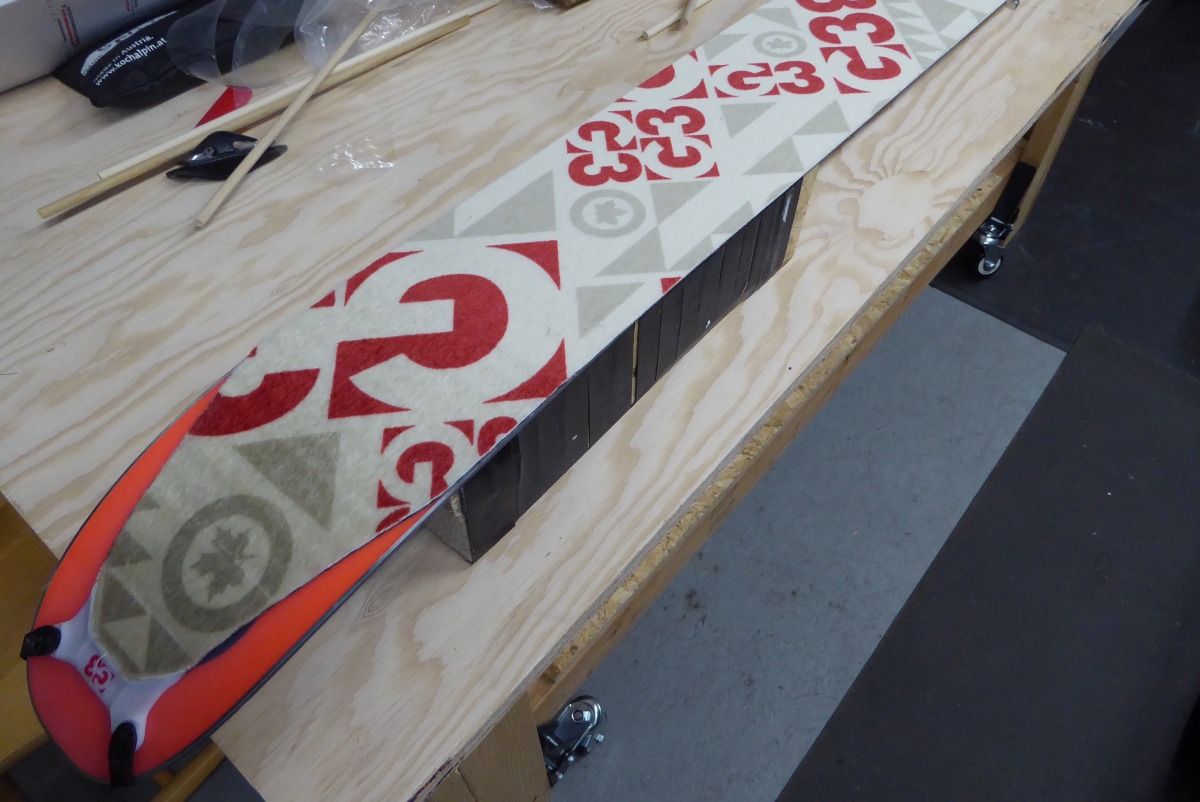
After attaching the skin, I then flipped the ski over for centering.
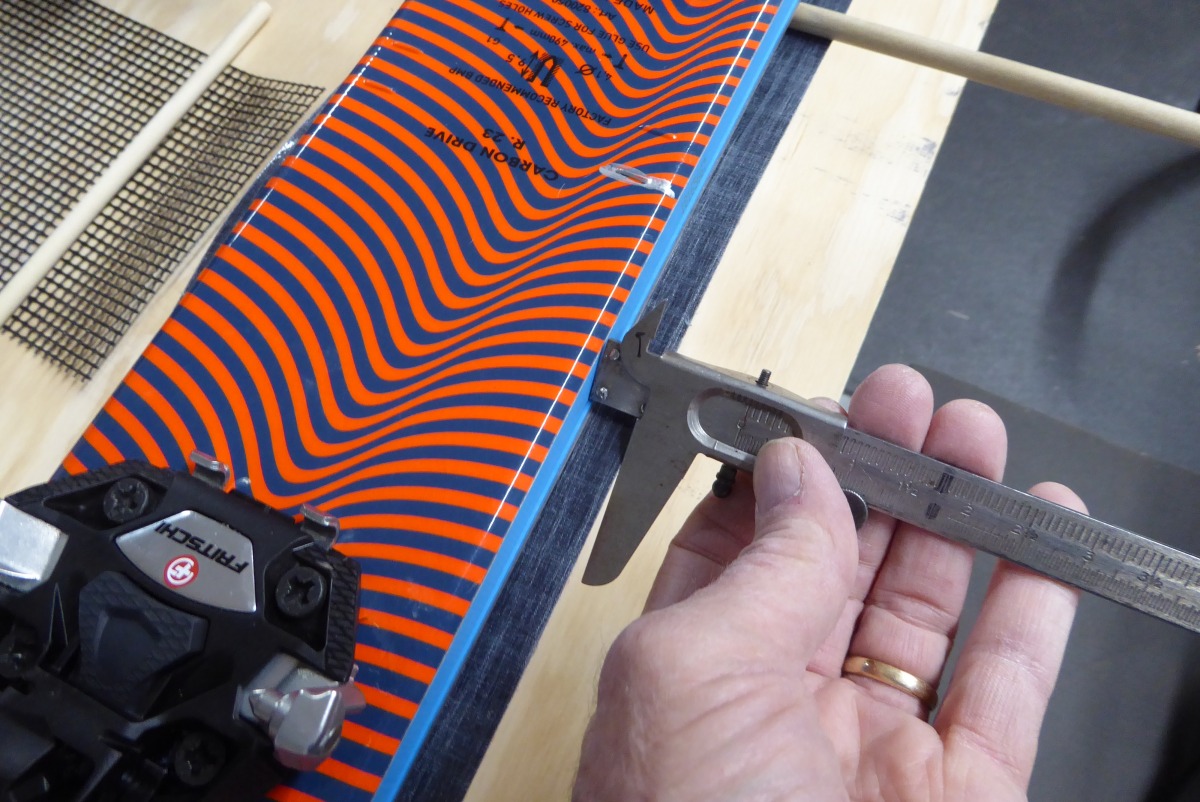
Measuring for centering. One it’s right, you just press the skin to the ski, and pull the associate dowels. Child’s play.

The G3 trimming directions tell you to center the skin, but don’t offer anything on how that might be done. And let me tell you, these things are so sticky, one touch without it centered, and you start over again, and again.
That’s it for skin centering, now to the cutting.
Here are the essentials of the actual skin trimming, in a list you can paste to your shop tech’s skimo bellows chest:
1. Use a decent, sharp cutter — one that does an automatic offset for the ski edges. Most brands provide this, Black Diamond does not. We’ve found Pomoca’s to be one of the easiest to use for any skin brand.
2. Rig a support system for the ski, supported in such a way as to allow movement of your hands and the cutter. Simply leaning the ski against a truck tailgate is not what I define as “support.”
3. Stabilize the ski. A human assistant is best for this, but I’ve used carpentry clamps as well.
4. Grip the cutter with locking pliers unless you possess the hands of Hercules.
5. Keep a bowl of water handy, periodically dip cutter in the water as you make the cuts.
6. Go slow, using lots of pressure against the side of the ski to prevent the cutter from wandering. If the cutter does wander to the outside, take heart, you can fix. If the cutter gouges more than a millimeter or two to the inside, sorry, you can’t fix, so be careful.
7. If you’ve never cut skins, it’s mandatory to practice first. Use offcuts from cutting skins to length, or an old pair of skins.
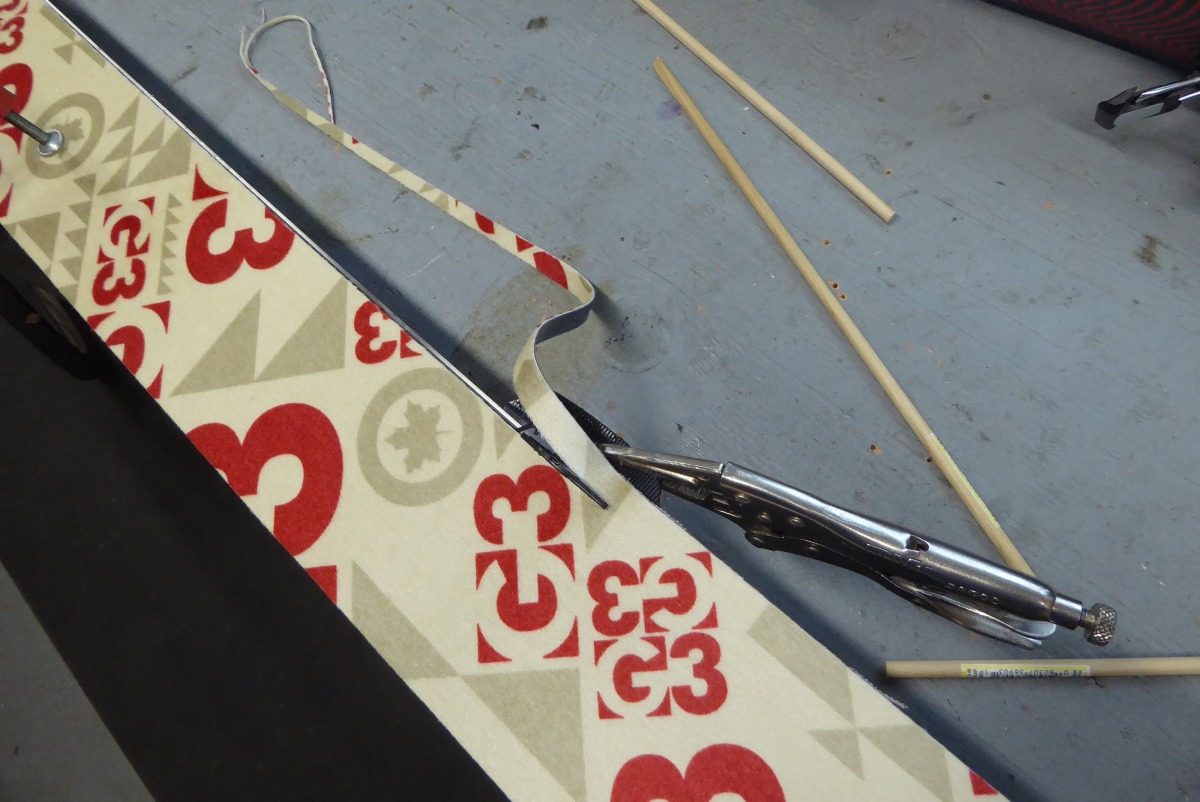
Making the cut.
Making the cut
Go slow, sometimes you’ll need to hold the off-cut out of the way so you can see what you’re doing. Cut from tip to tail, otherwise the cut won’t go a smooth as you’re working against the nap of the plush. I’ve found the right side (looking from the bottom, facing tip) is easy for my personal right-handed ergonomics, with the left side being difficult. Gripping the cutter with the pliers, and working on a stable ski are key when the cut is awkward. And what about if you do mess up? Read on.
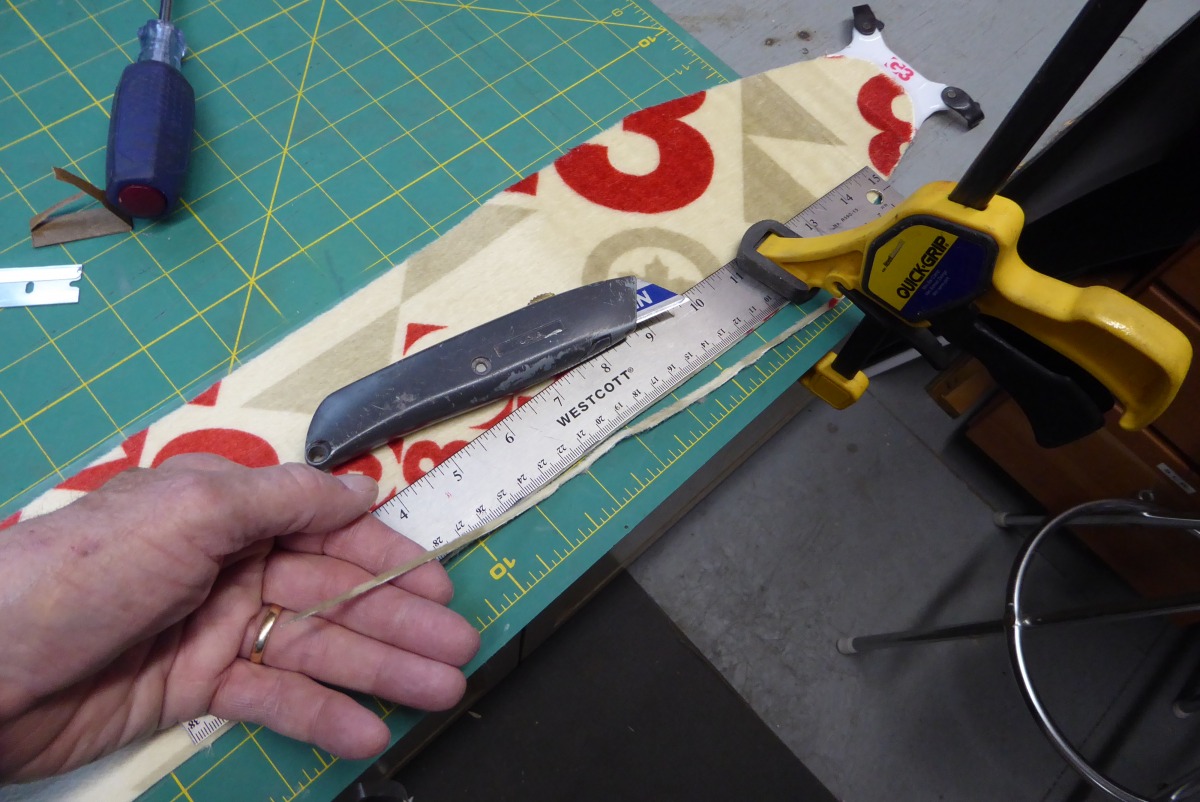
Fixing a mess-up.
Fixing a mess-up
If your cutter wandered out from the ski, sometimes you can just start over again. But not always. If the miss-cut is tiny, the cutter will just ride over it without fixing the cut. Trick in that case: Cut the remainder of the skin (being more careful!), remove from ski, stick to cutting board, then use a straight-edge and sharp knife to clean things up. If the cutter wandered slightly to the inside, likewise, you can usually just straighten things out and you’re good, as the skin doesn’t have to perfectly follow the ski edges and sidecut shape. That said, I’ve been in a hurry and didn’t notice the cutter tilting and climbing quite some distance in towards the center of the ski. In that case I relegated the ugly-fied skin to a narrower ski, vowed to do better, and kept my screw-up secret to preserve my fragile ego.
Conclusions
Climbing skins are expensive, and easy to mess up when cutting. Practice on trash. Have a backup plan in case of mistakes. Leave it to a shop employee if you’re in doubt, but inspect their work.
I’ve got a lot of respect for Werner, of the Contour Hybrid Skins. Below is his method, using a split liner.

WildSnow.com publisher emeritus and founder Louis Dawson has a 50+ years career in climbing, backcountry skiing and ski mountaineering. He was the first person in history to ski down all 54 Colorado 14,000-foot peaks, has authored numerous books about about backcountry skiing, and has skied from the summit of Denali in Alaska, North America’s highest mountain. He published his memoir, Avalanche Dreams: A Memoir of Skiing, Climbing, and Life in 2024.