(Addendum, 1/9/2020. After more days of field testing, I’ve concluded the locking lever on my set of Xenic is too difficult to pull up by hand. Moreover, the brakes tend to not deploy when exiting the ski. I like the design philosophy of the Xenic, especially the side release at the toe, but it’s possible this freshman effort might need another iteration. On the other hand, it’s possible I have a pre-retail version and need to be using the latest consumer version. Watch this space for more.)
Zee Xenic is scenic. Sorry, I could not resist the alliteration. And it is.
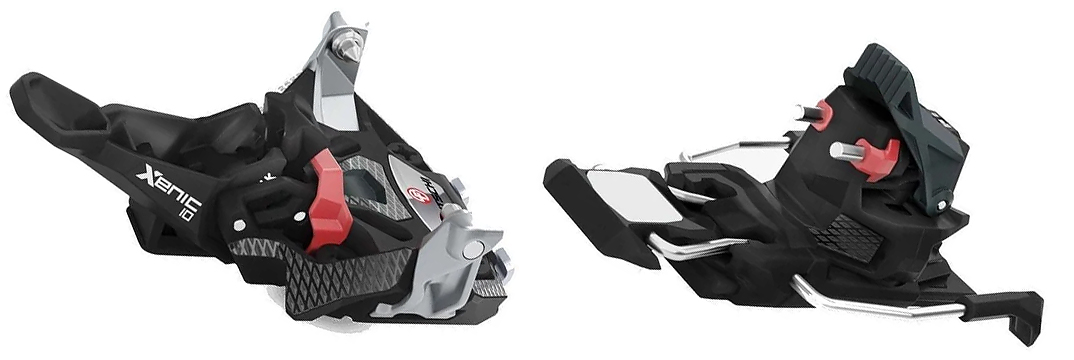
Detailed look at the new Fritschi Xenic 10
As an unabashed fan of classic tech bindings (pins and boot fittings at toe and heel, spring-loaded tow wings, etc.), I’m excited to see Fritschi go retro with their new Xenic binding. The new grabber indeed harkens to the classic side, with a few twists, and perhaps improvements. Follow along for a technical look.
Boot compatibility
Might as well get one shining question answered first. It is right there in the Xenic user manual: “…The boot must fulfill the standard DIN ISO 9523.” Sorry oh ye hopefuls, the binding according to Fritschi is thus not compatible with the Dynafit Speed Nose boots such as Hoji Pro, nor is it compatible with boots having “trimmed” soles, such as many skimo race boots. OR!? Update: Commenter JBO chimed in and said the dealer manual for the binding says all boot are compatible. And he suggested that removing the red plastic toe bumper allows a Speed Nose boot to work. Perhaps so, and I did try it after he suggested. The Speed Nose boot did have more travel, but still less than a 9523 boot. Sounds like this’ll be yet another reason brick-and-mortar retailers exist. (I had some photos here showing the boot stride, they were slightly misleading so I removed them. If necessary I’ll post up a few better ones.)
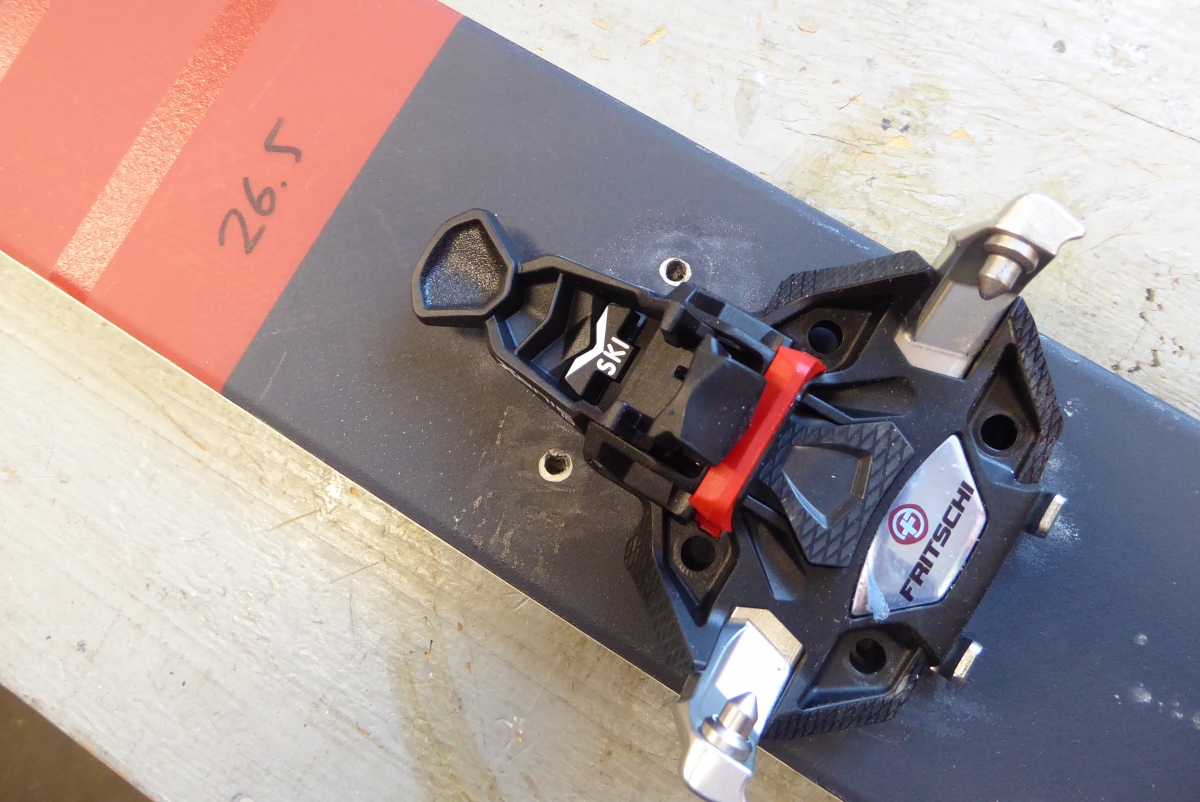
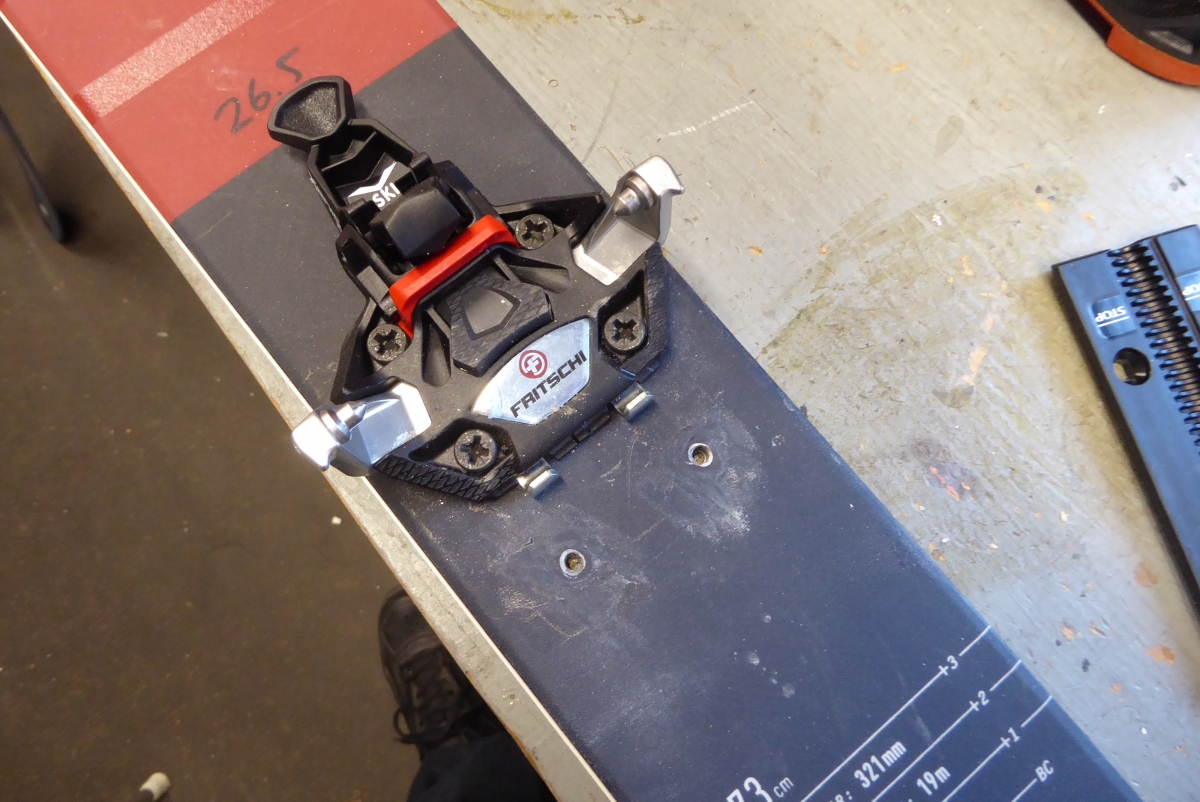
Binding screw hole pattern.
The binding heel mount plate of all other Fritschi none-frame ski touring bindings appears to be interchangeable with Xenic. As for the binding toe unit, the front two screw holes are the same layout as those of Tecton. With other Fritschi bindings such as Evo, certain pairs of toe holes match up, but using them fore/aft repositions the toe enough to not be acceptable. Your mileage with swapping will vary, point being if you desire a binding swap there’s a chance you won’t need a full set of new screw holes. Screw length was cross-compatible as well; I did not have to deepen the existing holes.
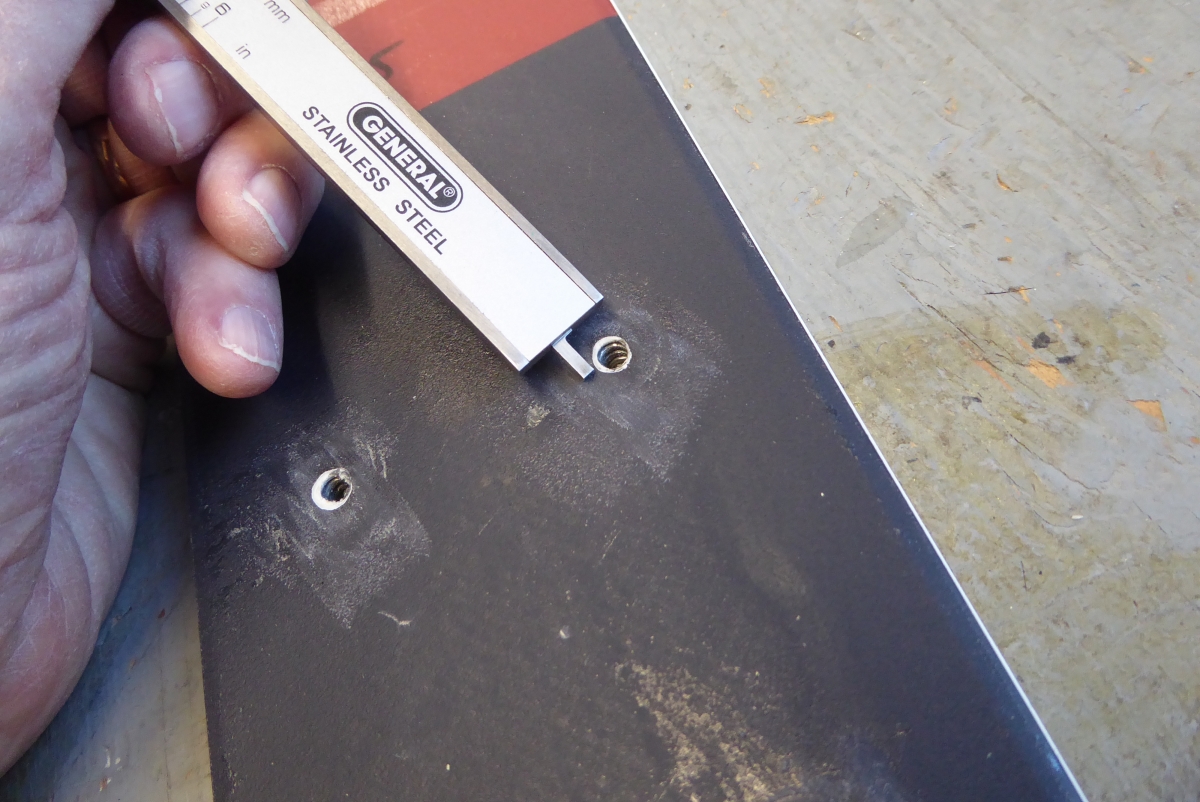
Screw depth measures same as Tecton, making my swap easier.
Tecton front pair of screw holes match those of Xenic. Rear mounting plates are all interchangeable but watch for maximum fore/aft rear unit adjustments if you play around with swapping.
The two rear holes of the front Vipec or Tecton will need to be filled during a swap, or in my case temporarily sealed with duct tape.
Toe
Next, how about the clamping force of those toe jaws? In my estimation, the strength of the classic tech binding toe jaw spring provides resistance to accidental release. I didn’t have my super duper test rig activated, but I did get repeatable results by simply pressing the heel of a boot to the side with my force gauge. In a way, this is the most realistic test, provided you’re consistent with using the same boots between different bindings. Using a boot with Dynafit certified tech fittings, I got 61.4 N with a Dynafit Radical, and 55.35 N with Xenic. I’d call both “average.” Would prefer a modicum more resistance, but neither binding could be called weak. (Bear in mind these numbers are for comparison only, they have little relation to actual release values.)

Check retention sans heel unit, to determine toe clamping force.
Perhaps the most important note on the toe: with most tech bindings, the toe wings undergo a compound out-and-down motion while opening up. The Xenic wings open only horizontally away from the boot toe fittings. This is said to make for a smoother release that’s less likely to accidentally “pre-release.” That’s difficult to test, but could be a good thing. The movement pattern of the Xenic wings could have another advantage. As they don’t have a midsection that dips down while opening, ice buildup under (or inside) the binding might not be the issue it is with most tech bindings.
Another “toe thing.” The trigger zone your boot toe presses down on while entering the binding is perhaps a little sensitive, especially if snow and ice are built up on your boot, but it’s better than a binding that doesn’t snap closed without fiddling around. Along with that, Xenic does have a boot toe locating bumper, intended to make stepping in easier. Overall, I’d call the step-in action of the toe “excellent.” See video at the end of this post, it clearly demonstrates all this.
Heel unit
The Xenic heel is similar action to other classic tech bindings. One appreciated feature is separate adjustments for side and upward retention/release tension. Friction is noticeable during hand rotation of the heel unit between downhill and uphill modes. This caused an increase in required hand strength (for rotating between touring and downhill modes) compared to that required by other brands. You’ll get used it (fold down the heel lifter for leverage). Note the tech pins are free to roll, as they’re not part of a U-spring configuration. This eases step-in force and reduces wear. The internal “spindle” or “heel tower” is said to be 40 millimeters in diameter. As this is a traditional tech binding weak point, good on that.
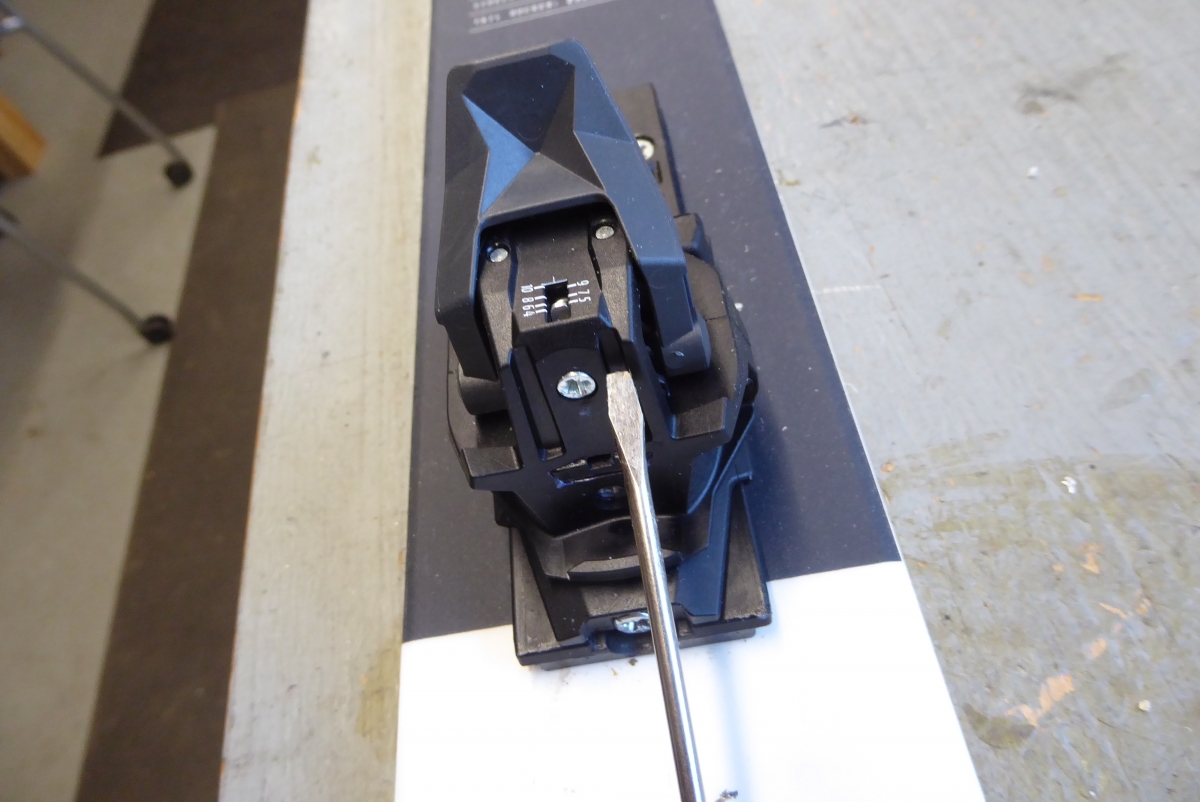
The release/retention tension adjustment screws are odd. They are pozidrive #2 (normal binding screws are pozi #3). Even the nearly infinite WildSnow tool collection is missing smaller pozi drivers. This was remedied with a quick visit to Amazon. But still. Can’t the Xenic adjustment screws be something more compatible with your multi-tool? As they are, you can hack-adjust using a small flat-blade screwdriver (as pictured) or a Phillips #2 driver. In the case of the Phillips, experiment with different ones, some of the number twos in my collection fit better than others. But use a pozi if you plan on changing settings often, or risk damaging the adjustment screw heads.
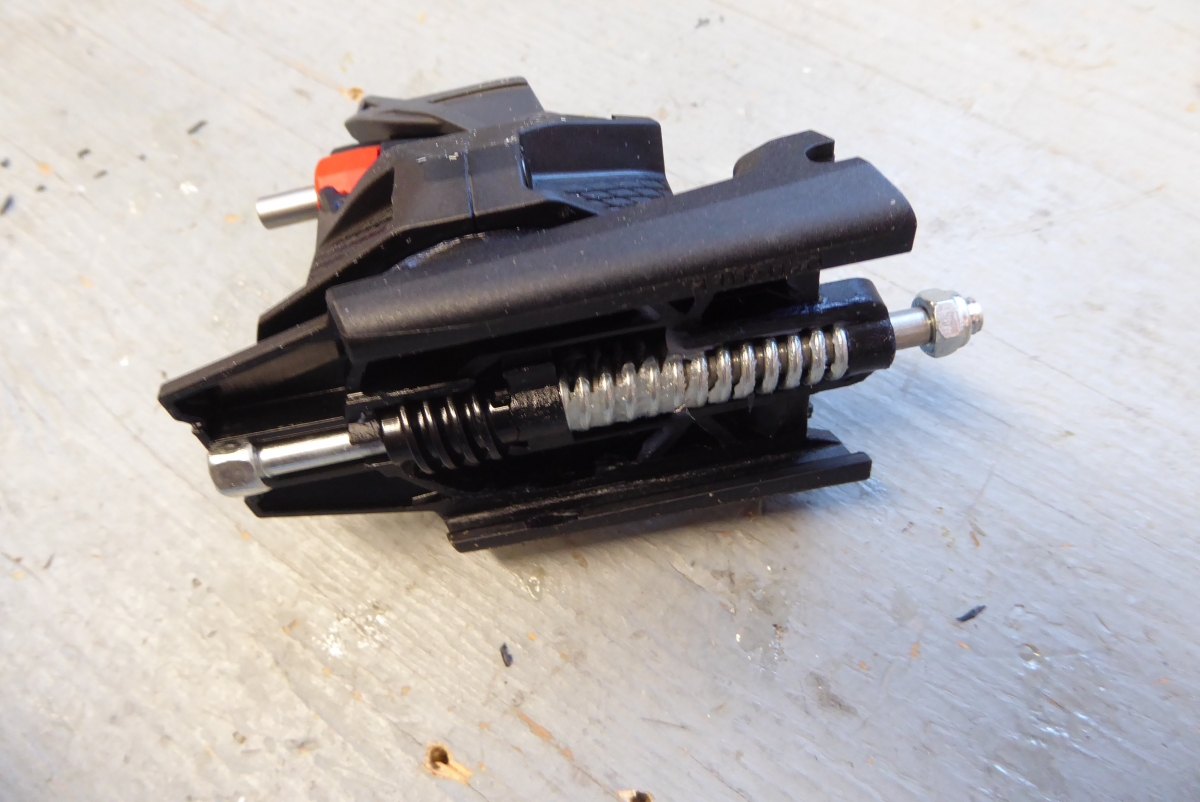
Underside of Xenic heel unit, showing ski flex compensation spring. The Xenic is specified for a 1 millimeter heel gap, flex compensation is thus mandatory due to the boot heel pressing against the heel unit as the ski flexes in use. Compensation travel distance appears to be 13 millimeters, though various sources say it’s 10. Either way, good enough.
Heel lift
Only two heights are available: heel flat on ski, or moderately high. No intermediate, no super-high. This could be a concern for North American skin tracks, but not so much in Europe where the tradition is lower-angled efficient tracks. See the numbers here.

Two heel lift heights. Either heel flat on ski, or moderately high. Most skiers can get used to this. Those who need a fine-tuned heel lift will want a binding with three choices.
Boot length adjustment
16 millimeters, utilizing heel base-plate adjustment track as with Fritschi Vipec, Evo, and Tecton.
General retention and release action
Toe operates similar (but not the same) to most other classic tech bindings. In a release, toe wings simultaneously open under spring tension as boot twists to side. With most tech bindings, while the wings open they also rotate slightly downward, this might cause a misalignment when elasticity is demanded during downhill skiing. The Xenic wings open horizontally, with zero downward movement. In theory this makes the binding less prone to accidental release, as well as making it easier to clip in. As for the heel unit, it rotates to provide release, with adjustable release/retention.
Entry in deep powder
When stomping your boot heel to enter Xenic in downhill mode, your boot heel has to slip down and past the ~90 degree angled “shelf” of the binding housing. If the ski is heavily flexed while you’re standing in deep powder, it’s possible your boot heel will will be obstructed by the binding housing — frustrating. Xenic is not the only binding out there with this little gotcha. It is not a deal breaker. But be aware and learn how to deal with your bindings in deep powder (hint, create solid platform before clipping in, or learn to clip your boot heel in without fully weighting the ski).
Ramp angle and pin heights
Boot ramp is similar to early tech bindings, an angle we like. Pin heights above ski are average. See the numbers here.
Brake
The available ski brake is where I had a few minor issues. First, if you home-mount, be prepared to don your Sherlock Holmes cap. Like figuring out some of the other Fritschi brakes, this one will tax your proprioception, visual acuity, hand strength, tool set, reaction time and intramuscular coordination. (To be fair, Fritschi does include brake assembly instructions with the binding, but still, I found the install taxed my psyche.) Then after the claw is installed, to operate it you’ll need what I’d term above-average hand strength. But the brake does work, and it becomes easier to operate after you’re accustomed to it (hint, fold down the heel lifter for better leverage). A kudo: the brake has the desirable feature of reliably retracting with zero(!) chance of popping open while you are touring. That’s the only type of touring binding brake I can unequivocally recommend.
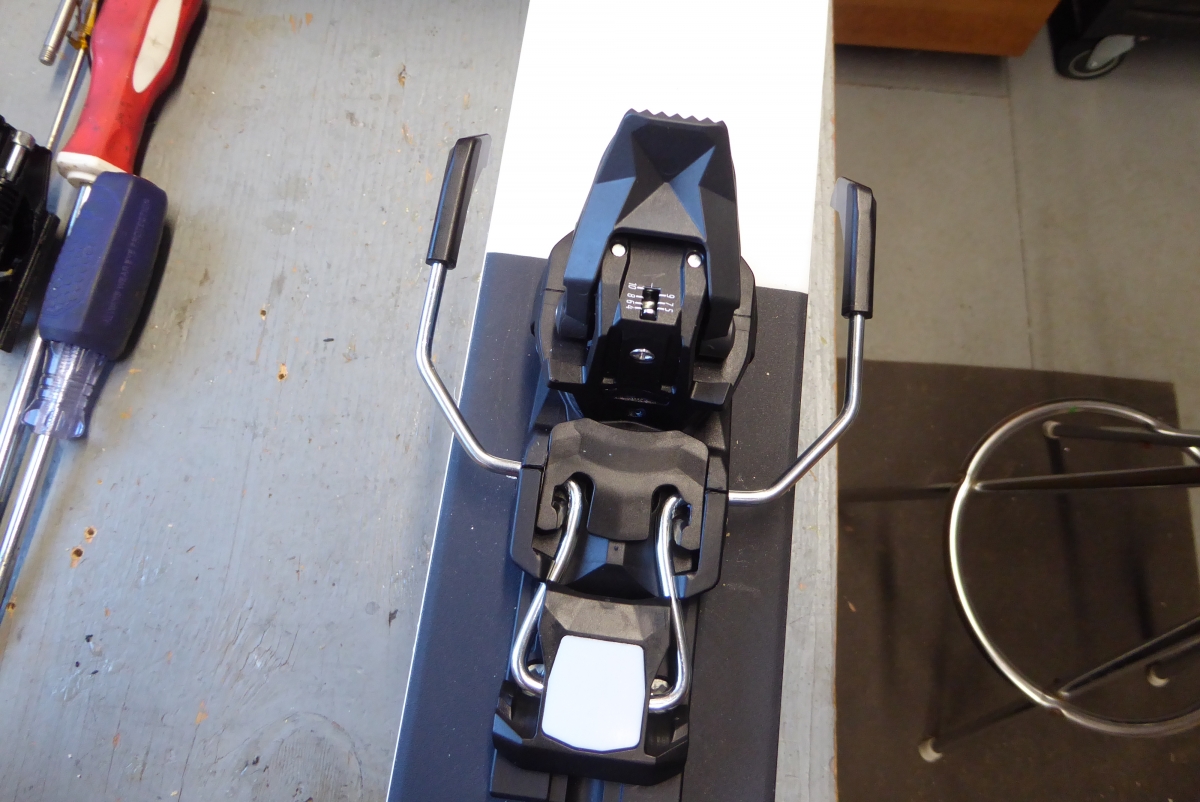
Brake is firmly and reliably stowed when you rotate heel to touring mode.
Mounting screw pattern
Front 33 x 44 mm, rear (short non-demo plate) 27.5 x 60 mm
I did make my usual template for our esteemed WildSnow readers. It’s here. Let me know if you have trouble with it.
Weight, 2019/2010 Fritschi Xenic ski touring binding
Toe unit with screws: 118 grams
Heel unit with screws and stock heel plate, no brake: 184 grams
Total, no brake:302 grams
Brake, 105 mm: 48 grams
MSRP is worth mentioning, at $429.95 this could be an excellent introductory binding.
Overall impressions and conclusions
I see no significant concerns with this grabber. Durability is of course unknown until consumer “testing” commences (as always, I recommend giving any new tech binding a season of retail vetting before purchase, but early adoption is of course a North American tradition, so have at it if you will). The heel rotation action exhibits a slight grabby friction feel when rotating by hand; under normal skiing forces this is probably a non-issue. Remember that Fritschi says you can only use DIN/ISO 9523 boots (though this may be subject to change, see comments). The subtle “horizontal” action of the toe wings might mitigate accidental release and icing problems. Overall, a clean effort by Fritschi that honors yet intelligently departs from the tech bindings of yore.
Shop for your own pair of Fritschi Xenic.

WildSnow.com publisher emeritus and founder Louis Dawson has a 50+ years career in climbing, backcountry skiing and ski mountaineering. He was the first person in history to ski down all 54 Colorado 14,000-foot peaks, has authored numerous books about about backcountry skiing, and has skied from the summit of Denali in Alaska, North America’s highest mountain. He published his memoir, Avalanche Dreams: A Memoir of Skiing, Climbing, and Life in 2024.