Tech Tuesday is recurring segment sponsored by Dynafit to get you in the right touring gear and make sure you know how to use it.
Things to consider when choosing your next climbing skin
Sunlight breached a thin cloud cover as dawn broke on the mountain ridge. The crisp air hinted at how cold the new snow had blown in the night before. Better yet, I was out with a crew that was ready to hammer all day and we had vast miles of new terrain to explore. I careened down the first run, breathless between exalted squeals. Forgetting all protocol while transitioning, I stepped out of my binding and immediately plunged up to my thigh in deep powder. No matter. Instead of getting frustrated, I reached into my jacket to pull out my climbing skins and begin the race uphill.
But the skins weren’t ready to race uphill. No, the old skins I’d grabbed that morning were frozen and icy with no chance of staying on my skis. I was in for a long day, I realized. My trusted old friends and companions on tour after tour had finally had enough.
Climbing skins are likely the most underrated piece of ski touring setups. They are typically an afterthought to the always sexy and critical boot, binding and ski decisions. But they’re the crucial contact point with the snow for the majority of time you spend traveling up a mountain. You would never see a cyclist throw down for a new bike frame with shiny and smooth components and then grab bent wheels, rotten tires and patched up tubes to take the rig out for its inaugural spin. Yet we see this all the time in the world of human-powered skiing. I have even done it myself and ruined more days in the mountains than I care to admit!
The true value of skins is just the first misconception many users have about them. Here are five more commonly held beliefs about skins, along with evidence to bust them and tips gathered from real WildSnow trial and error.
1. Beginners should use 100% Nylon skins
I have seen this myth floating around on the internet for years because of the generalization “if you need grip go Nylon and if you want glide go Mohair.” It’s particularly been played to beginners who need more grip to compensate for the technique they haven’t developed. Yet, there are few ski tourers out there using 70% mohair/30% nylon skins that ever complain about grip on the skin track.
An analogy: there was a time before tech binding acceptance when the myth of the plate binding flourished. The thinking was that if you wanted a binding that skied “hard,” it needed to be heavy and have a plate. After decades of tech binding innovation resulting in the final approval and commitment of alpine brands like Marker and Salomon to the “new system,” that myth has been laid to rest.
Think of nylon as the plate bindings of the skin world. In very select applications it’s appropriate, but more often, a skin with mohair will prime you for efficiency and success. A 70% mohair/30% nylon or even a 100% mohair skin is sufficient for climbing the steepest of mountains. Getting the most out of mohair may require you to tune your skinning technique, but that’s hardly a bad thing. Whether you’re a beginner or seasoned pro, better technique will work to increase your uphill efficiency overall, no matter what kind of skin you’re on.
This isn’t so say nylon climbing skins are completely defunct. The material is durable, for instance, and doesn’t retain as much water on wet days as mohair. However, a 100% nylon skin packs down poorly and feel incredibly slow on a skin track. Last winter, I had forgotten my climbing skins and was forced to use a nylon set. The difference was palpable. I traded the friend I was with for one of his blended skins so we could do a side by side comparison. On my left ski, the Dynafit skin by Pomoca 70/30 mix felt effortless on each stride; on the right, a full orange nylon skin felt like I was dragging my ski across sandpaper.
2. You need edge to edge coverage on your powder skis
As some WildSnow readers will testify, skis used to be a lot skinnier. Now that the average width of an “all mountain” touring ski is closer to 100mm there is far more grip to go around. Try this: hold your skis together at the waist and look to see where your new rocker tips diverge from each other. Measure the width of the contact point and subtract 6mm to leave the edge exposed. If your uncut skins are as wide as this measurement, that’s fine.
Of course, fully covering your rocker shovel that will rarely ever touch the snow won’t slow you down significantly. It will, however, add a negligible amount of weight to each step and slightly less glide on your stride, especially while breaking trail. Use this rule of thumb: the more base material showing when cut your skins, the easier it will be to center your skins and increase your overall glide.

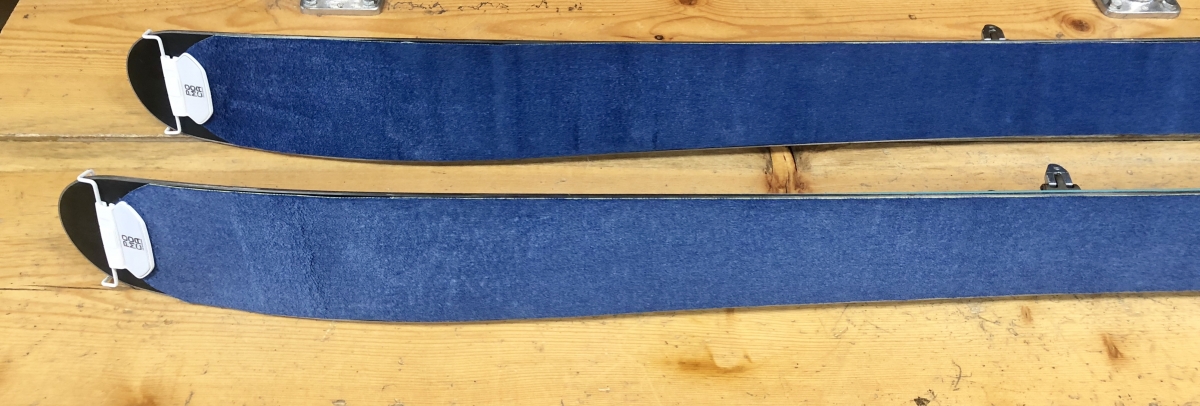
Nothing wrong with wall to wall carpet as seen here, but as your ski gets wider it may be more drag on the snow, especially when breaking trail.
3. All ski manufacturers make climbing skins
The call of a pair of pink Black Crows skins to match your pink highlighter Black Crows ski may, in fact, be more than one person can resist. But be aware: although they are a perfect match, Koch Alpin in Austria, not Black Crows is behind this clever rebranding. In many cases a skin being rebranded and sold as a package with the ski could be the exact right tool for the job, but sometimes it can lead you astray.
These days, hundreds of models of skins are available to coordinate with all the new touring skis, but many are just different patterns with different logos printed on the bottom. There are really only a few big skin manufacturers. The biggest companies –– G3, Pomoca, Black Diamond, Contour and Coletex –– make skins for the majority of companies who rebrand them, while there are a few other small companies out there doing it for themselves. Pomoca alone makes skins for the following: Dynafit, Jones, K2, Dynastar, Rossignol, Blizzard, Voile, Movement, Solomon, Faction and more.
When choosing skins, the priority is to pick a brand based on glue and plush, and then consider tip and tail attachment preferences. The glue for a skin manufacturer stays relatively consistent between different models and rebranding. It is the plush side and the way the treatments placed on the skin that makes up most of differences. Only as a finishing touch should you worry about whether the logo matches your brand of skis.
4. Re-gluing climbing skins will save you money
What a bummer! My skis are leaving glue on the bottom of my skis but everything else on the setup is perfect. I know, it’s tempting to buy a couple tubes of glue and set to work reviving your skins. While skins can certainly be touched up by adding glue, a full re-glue of a hacked pair of skins is a dirty job. You must first entirely strip off the old glue before adding the new layer. This entails superheating a scraper to a dangerous level, which then makes the glue molten to the touch or vaporous to the lungs. The corresponding smoke that fills the room is definitely not the fun kind.
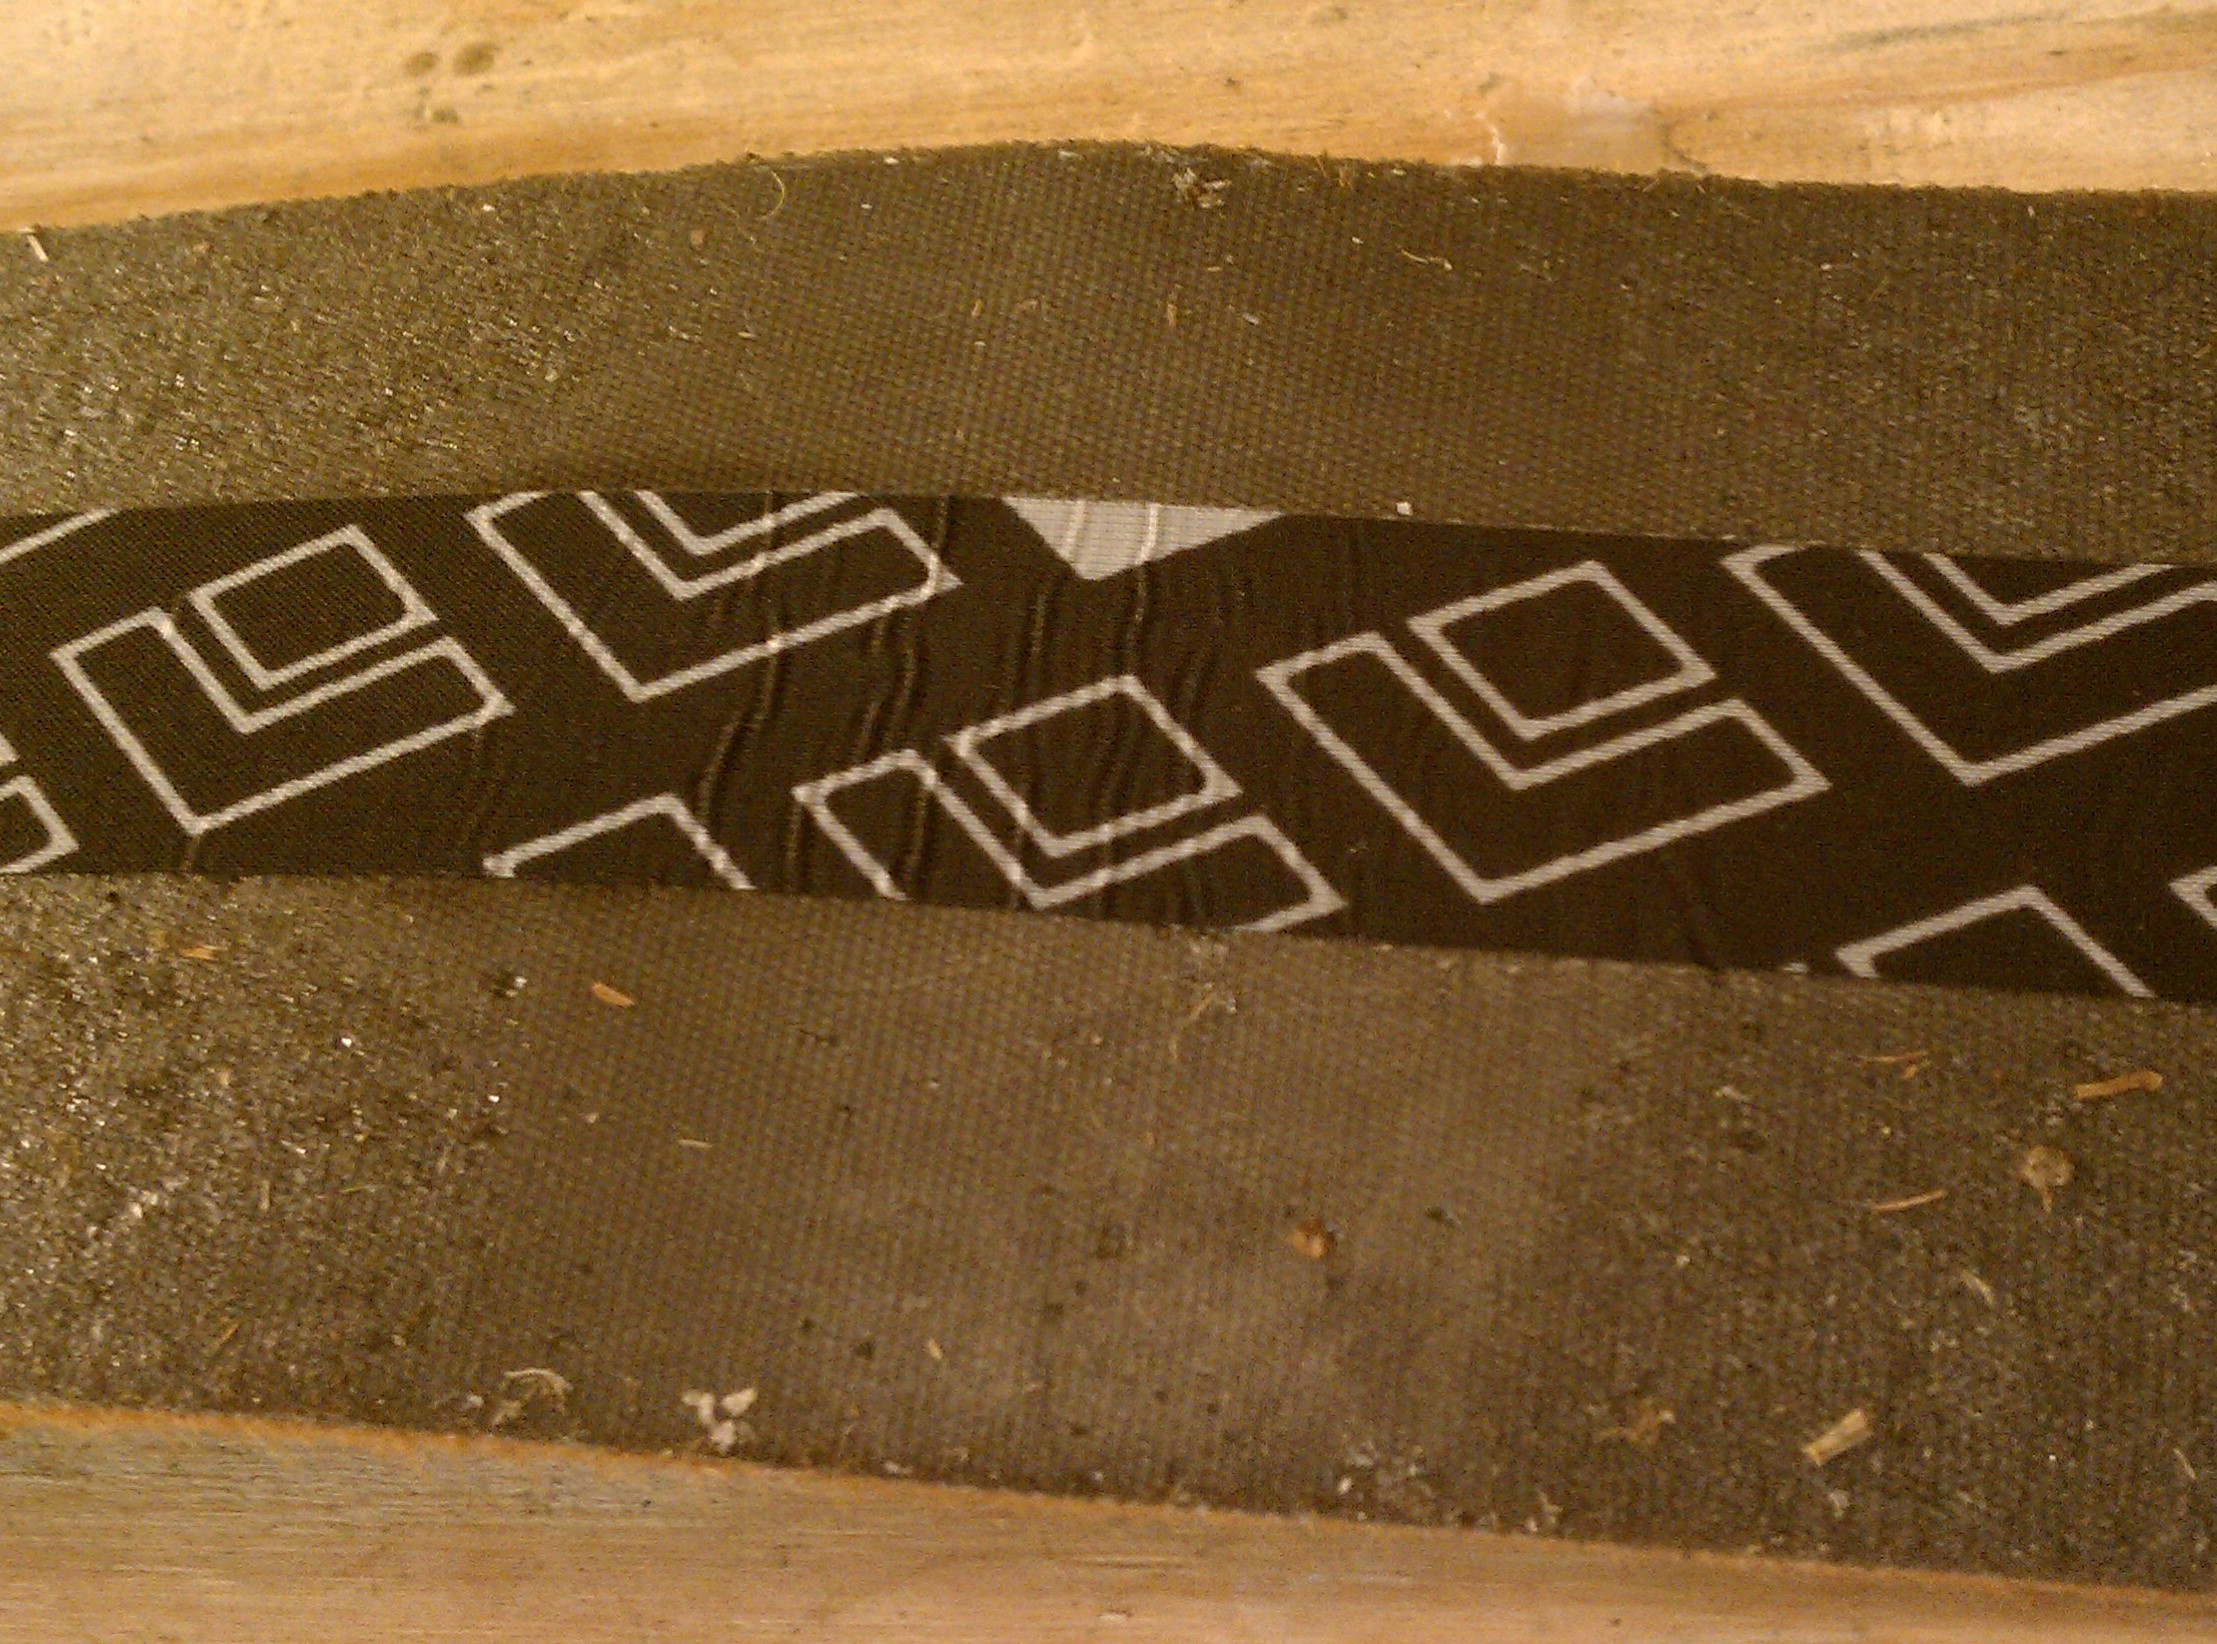
Sure, you could hire a shop to do this, but it won’t save you that much money. Throughout my years working on benches around the country, I’ve found it’s nearly impossible to offer this service for less than $100. With $50 for supplies, a couple tubes of glue and hours spent, you could probably find a pair on sale for less.
Just because you can’t effectively pay someone else to do your dirty work doesn’t mean there isn’t a DIY approach. If cracking a beer in your garage and huffing chemicals for a few hours sounds like a good time (it has for me on more than one occasion), go for it. But, keep in mind that the new glue may not last as long as the factory laid glue and therefor you may see it fail in the field faster. This method should only be employed on its merits of reducing waste and not on cost savings alone. (See our step-by-step from the archives if you want to know more.)
5. Climbing skins will last the lifetime of your setup
Again, think about skins like the tires on those summer devices a.k.a. bikes designed to hold us over until the ground is white again. If you let the rubber decay until it is hard and brittle or thin and bald, you are going to spend your rides flatting, slipping out and getting angry.
$200 seems like a lot for a piece of faux animal fur with glue on the back, but each day out in the mountains in priceless. If you consider your ski touring setup to be composed of skis, bindings, boots and skins, skins are the least expensive component. With decent care (more on that in a future Tech Tuesday), you should be able to get almost 100 days before seeing performance begin to drop off. The extra $2 per day you can eke out of an old pair will rarely be worth the ultimate headache of ski touring known as skin failure.
Back to my powder day fail: it was not from lack of experience that I pulled that old pair of orange skins out of a dusty covered crawl space bin that should have been left for archaeologists to study the primitive ski tourer in decades to come. They did, after all, fit my new skis perfectly. I spent the rest of that epic powder day slopping up kickturns and then lagging behind my partners with bulging base layers and skin glue tearing at my chest hair, trying desperately to coax my skins into one last lap. Some people just have to fail to learn, and it seems I’m one of them.
44 comments
Another tip: Straight-Cutting your skins (or buying them that way in the first place) is good for reducing weight of the skins, but it also makes them easier to fold up and store in your jacket without the glued edges glomming on to everything….and you. I even use one pair on several skis, all of different widths, but close enough that I cannot tell any difference in use.
For the widest of skis, you can even cut out the middle, which makes folding up and storage a breeze, and gliding easy. This is a bit of a trick – but some manufacturers even sell them this way. Putting them on is a bit of a fiddle though.
I like it Wookie, I also use one pair of skins for many different skis. It is definitely an advanced trick, but the added glide and packability is way worth it IMHO. I haven’t messed with the split skin since BD came out with the ones with sail cloth were sewn in the middle, but its probably time to check out the new iterations.
Still using a set of the BD split skins with the white dyneema cloth. They weigh about nothing and glide is about average. Seem to stick well enough and for the skis (Icelantic Shamans) and locale’ I ski, they work well. Was a great concept and worked… Definitely could be improved upon though.
I do think that skin coverage on the rocketed shovel causes significant drag when breaking trail in deep snow. I either tapppr the skin quickly down to about one inch in width or cut it short and sew a piece of 1” flat webbing to a G3 tail hook. I do this on both tip and tail and it makes even nylon skins a lot lighter and easier to handle. Of course I also touch up and reglue nylon skins over and over again because I am both OCD and addicted to drinking beer and fondling my gear. Not to mention I am a cheapskate telemarketing. ?
how well compromising on skin coverage works might depend on where you ski, after backsliding into tree wells at Rogers pass on steep icy uptracks, I got smart the next year and went W2W coverage … no more backsliding
” But, keep in mind that the new glue will not last as long as the factory laid glue and you are more likely to see it fail in the field. ” I’m not sure I agree entirely with this ^^ statement assuming the job is done properly which means strip old glue completely/ iron in the new glue at medium high heat with parchment paper, whereas some people just add the glue without heating and do a shitty job
I think the reglue process is too messy/techy for most people so they just buy new skins, I’ve reglued for a few GOOD friends but I don’t see how a shop could make money on regluing and I don’t wana do it anymore, IME the glue-killer for any brand is not drying the glue after using the skins, if you leave water on the glue it will hydrolise, if you see the glue turn white its absorbed water and yer glue is screwed
Nice read, well written. Almost agree to all points but the regluing issue. Transfer tapes to iron-on fresh hot melt glue are much less messy than glue in tubes. But isn’t hot melt kind of old-school anyway?
Werner Koch – contour skins
oh Werner….LOVE those transfer tapes….and your glue! Einfach Perfekt!
Last season I successfully re-glued a pair of Camp race skins. After some research, I used brown paper bags torn into strips and ironed over the tops to melt the glue and let it absorb and transfer to the brown paper. Much less messy than heat ‘n scrape technique.
Then I purchased G3 Glue Renew (https://us-store.genuineguidegear.com/products/glue-renew) in sheets and cut only what I needed and still have enough left over from re gluing one pair, I can re-glue another pair. Stored over the summer in a dry cool place…that glue will run when warm…
Hi Scott, how many days do you have on the new reglue and how long did the process take?
Doug,
Probably only 10 days on the re-glued skins….total time once all supplies gathered…about an hour.
Excellent article! I have plenty of friends I will be sharing this with when I get asked for climbing skin advice this fall.
For future articles, I’d love to see something on skin tip attachment systems. Or, more precisely, a discussion of why the heck the industry standard *isn’t* skimo-style knotted bungees (and no tail attachment) for all skis & skins. Everyone I know who’s gone that way has never looked back — shorter stays on windy ridgelines and sketchy ledges, sign me up! It’s only ever let me down once, and Voile straps got me home just fine.
Thanks for the feedback, Bobby! And for the tip (ha) on skin attachments. We’ll keep that in the cue for the next climbing skin how-to.
IME the transfer sheet method of regluing skins costs 3 times as much $$ as buying the glue in a tube so I buy tubes of goldlabel, whichever method you use removing the old glue will create a hell of a mess anyway. There will be less of a mess if you tack the skins down to scrape off the old and spread on the new glue. I have no experience with the un-old-school skins that don’t use hot melt glue, I plan to keep using hot glue and let other people do the new-school R & D
XXX_ER,
Agreed, not cheaper, but nice thin layer equally spread throughout is achieved and I have always put off doing this dirty job and now I don’t fret about having to do it again next time.
That brown paper bag thing worked fine until ski bro ran out of paper bags and tries to use newspaper which created a real mess, I got it all off with a scraper and heat gun … scored a case of beer. I bet rags would work but i like the heat gun and a 4″ putty knife
I mostly agree, going light is best. I disagree that nylon skins are akin to plate bindings. Super-lite mohair skins have their own issues that may offset some of their benefits.
1- Thin/non-rigid skins can curl at the edges causing a layer of snow to build between ski and skin, adding weight and drag. I’ve tried adding glue at those spots but the constant drag on those thin edges cause them to bend and curl away from the ski. The best fix I’ve found is cutting them straight, not wall to wall, as they curl most at the widest part of the ski.
2- Thin skins tear. At a short gliding-descent between two peaks while ascending a ridge, I snagged a rock hidden by new snow, which nearly tore a skin in half at the ski shovel. Duct tape was useless due to the cold and snow, but a Voile strap wrenched tight over the tear saved the day. The strap held the skin on but it killed any ability to glide. When I got home I tried sewing the skin back together on my wife’s Bernina, but the glue caused too much drag and, four broken needles later (I should have removed the glue first), I sewed it together by hand with sinew. It held for the remainder of the ski season (about 15 days), but it’s time to retire those skins after only one ski season, which is several seasons less than I get out of my nylon, ‘heavy weight’ skins.
I agree with the commenters on re-gluing. I do a bit of touch up once or twice a season and every few years use a heat gun, iron, and paper bags to completely clean and then reglue with Gold Label. Easy and effective and that is for skins that get used maybe 50-70 days per year with lots of transitions. Fumes? Essentially none that I have noticed. Re tip bungies: I tried this last year after realizing how much more efficient removing my race skins was. It didn’t work very well – even tight bungies got kicked off now and then and, more importantly, I consistently got a lot of snow packed between skin and ski. I’m not sure why this is but suspect it’s because a) I spend a lot more time in deep snow, breaking trail, on more complicated terrain features, and stepping over tree branches with my fat(ter) touring skis than I do in a skimo race and (I think more importantly) b) the tip bungies work better with skiiny skis/skins than they do with fat skins – the leading edge of the skins just provide more surface to catch snow. Curious to hear from others that have tried this to hear their results.
I wouldn’t go back to a hot melt skin if you paid me.
I’ve been on the Contour Hybrid Mix for a few years and they are light years ahead of the competition. Easy to clean, light weight and durable.
I love the Dynafit and also the Ski Trab tip attachment (and tail, for that matter). I don’t understand why everyone doesn’t do something similar, it’s a pain to tear from the tail with skis on, at least for inflexible me. I also touch up my Dynafit skins (Pomoca nylon/mohair) with a hot iron and paper bag (to get the bad glue and pine needles off) every other year or so, and have done this for a couple of friends. In my experience, the skins are like new for at least 50 days in soft snow winter conditions after this treatment. I’ve never stripped all the glue, but haven’t ever had completely hydrolyzed glue. Really like the glide with the nylon/mohair mix, my friends with nylon skins are always envious. I’ve seen people attach the Dynafit rubber knob to the tip of other skins, and dremel a notch in their skis to fit it, seems a little dicey with expensive skis, but looks fun.
If that ^^ knob breaks on the Dynafit tip you don’t have to spend 15 $ on a new rubber. Tie a loop in a piece of 3mm bungy with a big knot.
Make the loop about the size of your finger, cut the head off a 2″ roofing nail, clip the bungy to the skin using the nail … costs a couple bucks
I just know that my new, supposedly high grip nylon G3 skins are much less grippy that the old Kohla mix. So much of a difference that I considered returning them after the only tour on them last winter, but I’ll give them an entire winter before I throw them away.
high grip G3s….every slowboarder I meet is on those things.
They should just tape shag carpet scraps to their boards.
Werner “New School” Koch commented above. I’m with him. I have used Contour’s Hybrid Glue skins for three years in all snows, all weathers. Second pair now, which is much improved: better in the cold, less sensitive to water between glue and ski. They handle beautifully, and when the grip starts to lessen, I wipe them down with Goo Gone, and they are like new again. No separators required, ever, and you don’t have to be Superman to pull them apart.
.
A ski companion last winter had a brand new pair of Contour Hybrid Glue all mohair skins. I had the mohair/nylon mix, and they were nearly new. We swapped one skin each. Neither of us could tell any difference in grip or glide that day in cold powder snow.
.
The single thing I don’t like about them is that they weigh more than my ATK race bindings, which hardly weigh anything. Weightless skins would be nice.
Useful insights, Jim. I’m keeping my fingers crossed for those weightless skins.
I’ve had many skins over the last 25 years. The G3 clips on the tip and tail have even ye most effective for me. Tip loops always come off as the skins stretch going up. I haven’t tried the nylon/mohair mix, a friend I toured with had significantly more glide than me. I’ll probably get them next time. One observation on skin width. It doesn’t matter at all if skinning up a low incline, but if you’re going up the fall line, more traction gives you the ability to skin up steeper inclines. Also, traversing steep, icy terrain requires both edge and grip. Cutting the skin within 1-2 mm of the edge gives you both.
I would interested in knowing if mohair clogs up on wet snow. I spray wd40 on my nylon skins and that really prevents clogging. Not sure if it would harm mohair. (Skin wax doesn’t work as good as WD40)
If you ski a lot of summer and spring snow, not regluing means your skins might not last a single season. Wet snow gets through the plush and degrades the glue no matter how much skin wax & DWR you use. I find I have to reglue my volcano ski skins once a season. It’s worth it. And it CAN last longer than the factory glue (my G3 skins came with glue that was garbage, but the BD reglue lasted plenty). Otherwise you’re throwing away perfectly good & expensive skins! Reduce, reuse, recycle, people.
Haha XXX_ER, I too have broken those Dynafit rubber knobs at inopportune times. Like you said, bungee with a knot and maybe a washer or beer bottle cap is pretty foolproof. Kicking them off can happen, for sure, though I consider the infrequency with which I experience this to be one of the few benefits of my duckfootedness.
Re: snow getting in, I just touch up my skins’ tips & tails with a little extra Gold Label. On skis that are 130mm up front I’ve yet to have a problem. Also, I keep the front end of the skin pretty wide (not bikini-style) and slip a nail in there to keep it stiff and to girth-hitch the bungee to. Lastly, my fold is plush-to-plush, so there is as much glue touching base as possible.
Re: Cutting tip notches into skis, I’ve never had a problem. File & sand everything smooth, then coat with epoxy. I’ve actually 3D printed some tip covers with notches, to seal everything up and keep it sandwiched together. Hit me up if you want the .STL file.
Re: G3 High Traction Skins, I (and others) have found that they take 4-8 trips to break in & reach maximum grippiness. Once they do, they’re awesome on a refrozen skintrack.
On board with most of the advice here, but like others, take issue with the re-glue point. Love the podcast and the blog, but this point was way off IMO.
1) Heating a metal putty knife with a heat gun while scraping down the skin will remove 99% of the glue. IME it doesn’t require a “DANGEROUS” amount of heat. If you are an adult, and can remove a hot pan from a stove, you too can handle a hot putty knife (hint: hold the putty knife by the HANDLE and don’t eat the hot glue). It should take less than 5min per skin to remove the glue. Smoke is something I’ve never seen during this process – not sure where that came from.
2) Adding new glue is the reverse process. 1 tube of Gold Label will do a pair of 110mm skins no problem. A tube of Gold Label costs $15, well beneath the “$50” stated in the article. If you buy glue, a putty knife, and a heat gun (heat gun not totally necessary, any heat source will work, albeit less smoothly) you may be in for close to $50. Apply a bead of glue to the clean skin, and spread with warm/hot knife. This might take 10min per skin depending on your level of OCD.
3) Pro Tip: The wax-backed paper that comes with new skins can be placed on the re-glued skins (wax side facing glue), heated with a waxing iron, and peeled after the glue has cooled to room temp to produce that shiny factory finish. If you didn’t save the factory wax paper, grab it from your friend who bought new skins from Doug.
This is a 1.5hr MAX (3 beer) job for a newbie, and a 45min (3 beer) job for a pro. My most recent re-glue has lasted ~40 days thus far. If the plush is still good, let ‘er rip.
Thanks for the podcast love Sam. This is coming straight from dozens of people I have personally talked to that have had a really hard time with the process. As I said, if you love DIY projects re-gluing skins is a great one to take on to avoid wasting of a pair of skins. Careful with those glue fumes though. I have also seen a lot of people accidentally get glue on the plush side. You only need a few drops and you are going to have a place for ice and snow to build up. I would also like to remind the commenters above that WildSnow has a special breed of extra sophisticated crew of DIY followers, so sometimes the ease of these projects can be a bit skewed. Sam any interest in writing a step by step?
Cheers Doug. I think there’s lots of bad info out there on how to reglue and that leads to bad experiences for some. It appears many commenters here have had good luck, so I’m not sure where the disconnect stems from. Not sure if the glue comment is tongue-in-cheek, but I’ll admit that it’s one of your stated concerns that I don’t have good info on. My guess is that infrequent exposure isn’t a big deal, but a life as a skin regluer would likely be a short one. Probably worth knowing the realistic hazards rather than guessing. PS – I did see that M and maybe others at HQ thought my comment was harsh – seems my own attempt at tongue-in-cheek ribbing was a bit heavy handed. Apologies if I bummed anyone out. Party on.
M is used to whipping college kids into shape. I like the banter so she took it down! I figured it was ok that you alert people to my get rich quick scheme of skin sales. The comments definitely have me interested in revisiting it and maybe supplying some better knowledge. The DANGEROUS heat referred to a skin remover specific tool I acquired from Europe. It had a tiny plastic handle and a giant exposed heating element. A bit of a lack of OSHA there, dang that thing hurt. Glad to here the low tech method is still the way to go.
Another very satisfied user of Contour Hybrid skins (100% mohair). Around 75 days on one pair last season with air temps ranging from -15 F to +65 F. Keeping them stuffed under all but your inner layer keeps the glue nice and tacky on the really cold days and drying the ski base keeps the skins sticking on warm spring and summer days. I wipe down the glue with the Contour cleaner (and then goo gone when the Contour cleaner was gone – thanks Jim M!) whenever I can see some dirt on the glue and then the skins are back to new. No reglueing, paper bag / hot iron treatment required! Try a pair and you will not go back to hot melt!
Oh, ripping skins is a breeze!
” I tried sewing the skin back together on my wife’s Bernina, but the glue caused too much drag ”
A good fix it to remove the skin glue in the damaged area with heat, use a thin backing material ( drywall patch tape or a spent dryer sheet) to overlap the cut, glue/clamp the patch on with a thin layer of Aqua seal, after it cures put the skin glue back on and yer good to go
Part of a good job is managing the mess, I have a designated 16″ wide off cut of plywood i use to tack the skins on for reglue jobs, that way I can move the skins out side into the cold to off-gas/ dry overnight.
The release paper comes off easier after ironing the new glue if the skins have a chance to get cold or freeze, If you threw out the shinny release paper after you trimmed the skins or it got ripped use baking parchment (NOT wax paper! ) paper but by all means heat the new glue to make it stick and smooth out
I like Wildsnow but this article was written buy a guy who sells skins for a living. The idea that you can’t easily reglue skins or that it requires $50 in supplies or that the end result can’t be excellent is ridiculous. A flat work surface, a $15 heat gun from harbor freight and an old plastic card from your wallet will clean off 99.9% of old nasty glue in minutes. (Skip paper bags they’re worthless). A bowl of hot water and a part of a $15 tube of Gold Label again spread with that old card, maybe with a little warmth from the heat gun and you have a completed revived skin. If you’re really anal some parchment paper and a pass with an iron will make it look perfect. It isn’t rocket science!
Sure you can re-glue skins and that’s why there are supplies sold specifically for this purpose. I’ve done it with heated metal plug-in blade (i think they’re actually designed for decal removal), paper bags and and iron and my favorite: heating a metal scraper with an iron and using that to pull the glue. Here’s my 2 cents that nobody asked for: it’s a f*$%ing mess and one of the times i did it the glue just fell off a couple of days later. All that messy, smelly work for nothing. Yes you can re-glue and you can even do it for pretty cheap, but I think I’d rather just have skins that work, so… I take as good of care of my skins as I can and use them till the glue starts pilling and falling off and then I get new skins.
After you ^^ put the new glue on the skin the instructions say to heat it up/in which I assume you did? I put parchment over the new glue, max the digital waxing iron to 320F ( waxing temp is more like ( 260-270F ) which also helps to spread out the beads of Gold label, maybe roll it flat with a wine bottle and if you got the skills its possible to use a nekid iron on the glue with no parchment or release paper
Just to add a little bit on reglue: Heat gun hasn’t been necessary for me. I have a hair blow dryer that I use to heat the glue, then just scrape with a metal paint scraper & elbow grease. The glue comes off fine. I spread the fresh glue with an old credit card, ski pass, whatever. Heat with a waxing iron through parchment paper, let dry overnight on the porch, and good to go.
I’ve done the paper bag thing but it doesn’t work in my experience. Also, as many have noted, you’ve got to do this outside unless you want to get high on toluene. I think I learned all that from blogs & forums like TGR.
One plus for the Orange BD nylons… I’ve got a pair that’s gone well over 200 days with no signs of upcoming retirement. They’re definitely slower though….
My only attempt to fully reglue skins definitely convinced me it’s worth buying new ones – the time and mess wasn’t worth the cost savings. Of course, YMMV. I have found that when the glue starts to lose some tack, you can put on paper bag sheets (or the paper that came with the skins) and hit the skins with an iron. Does a pretty nice job of getting the original glue sticky again.
Ironing the old glue of skins that are leaving glue on the bases might work for a bit but IME it usually means its reglue time sooner than later
a rather acomplished guide told me an easier way to rejuvinate skin glue with heat was to put the skins in a bag and thro the bag in the dryer
I’ m waiting for someone else to try it
Lots of skin regluing youtubes out there on the WWW, I suggest folks watch a few of them and form a consensus on the best method but maybe this thread just proves there are people out there who should not be allowed to own tools
Hi Xer, I think rather than folks’ skill level re “owning tools” it’s more about time, situation and many other factors. We’ve always encouraged DIY here, as you of course know, but I try to do it in a fun way with no judgement or pressure on whether people do it or not. Or put another way, not every person can do everything, or wants to! Heck, there is always one more tool, that is a spiritual law, but if I don’t feel like _buying_ one or two more tools, not doing so is forgiven by the angel of DIY, eh?
(And on another note, even my steel trap brain can ever get the homeophones of angel and angle right, anyone know if above is correct? I guessed.) And the dryer technique sounds like curing smallpox with vitamin C.
I duno lou point 4 is infering that regluing doesnt work very well ?
So people in this thread relating they had problems and people also say skin re-gluing is actualy not rocket biology ?
You can’t pay someone to reglue your skins so its buy new skins or DIY, but even tho its not really a high skill job, even with all the info on the subject … some DIYers get it wrong
HOW/WHY/WHAT step did they miss might be a good question to ask ?
yeah that guide was smiling alot when he told us about the dryer method
Obviously I’m kidding about not letting people own tools
Agree with everything except skin width. On a steep windblown traverse you need skin traction under foot. The tip and tail thirds are not a problem narrower than the ski. But you need the skin within 2mm of the edge underfoot over the middle third of the ski. So if you have big skis 140 in the shovel and 110 on the waist, a 110 skin (trimmed to 106 in the waist) will work fine, 100s would be a problem.
I’d be interested in hearing more on skin adhesion in wet snow, particularly brands or glue types that are most reliable. Unfortunately we don’t all get to ski the Wasatch or San Juan’s. Here in the Cascades we get a lot of variability, sometimes “cold smoke” but more often a higher water content. I find it’s all too easy to get snow building up between skin and ski, especially at the edges or tip, and then it’s a battle the rest of the day. My orange BD’s probably have <50 days on them and I’m about to replace them. BTW thank god for the tail clips or yesterday’s otherwise fantastic skiing would have been a major exercise in frustration. I may try reglueing these (3 beers, 1.5 hrs, Spotify list cranking, garage door open for ventilation) but that’ll be more for fun and to have (yet another) backup pair than to rely on these for my upcoming hut trip in the Kootenays.
If you’re looking for new tip attachments check out the piercing and Clip from Montana It allows you to have a steep angle in the tip to keep snow out. Glue is also very good and skins come with a water barrier layer, but waxing is still a good idea. Check out what they call the skinny too, makes for quick and easy storage on the hill. They’ve been up to this since 1939, well before many other companies were born.
The web page also shows a skin with glue you can wash if you get it dirty, they call it Fusiontec. Some sort of new adhesive. I find the re-glue process much easier with the transfer tape and use the tube for spot repairs.
Comments are closed.